Implementing GA4 Tracking on a Shopify Website Using Google Tag Manager: My Recent Experience
Recently, I had the opportunity to work on a project where I implemented Google Analytics 4 (GA4) tracking for a Shopify website using Google Tag Manager (GTM). Here’s a detailed step-by-step account of the process I followed:
Step 1: Set Up Google Analytics 4 Property
- Create a GA4 Property: I started by navigating to the Google Analytics account, going to “Admin,” and creating a new property under GA4. I followed the setup prompts and successfully created the property.
- Get the Measurement ID: After setting up the property, I went to the “Data Streams” section, selected “Web,” and copied the Measurement ID that starts with “G-.”
Step 2: Set Up Google Tag Manager (GTM)
- Create a GTM Account: I created a new GTM account and added a container specifically for the Shopify store.
- Install GTM on Shopify: To install GTM on Shopify, I inserted the GTM container code into the
<head>and<body>sections of the theme.liquid file by navigating to “Online Store” > “Themes” > “Actions” > “Edit Code.”
Step 3: Configure GA4 Tag in GTM
- Create a New Tag: In GTM, I went to “Tags,” created a new tag, and selected “Google Analytics: GA4 Configuration.”
- Enter Measurement ID: I pasted the copied Measurement ID into the required field.
- Set Trigger: I set a trigger to fire on all pages, ensuring the GA4 tag loaded on every page view.
- Save and Publish: I saved the tag configuration and published the changes in GTM.
Step 4: Enable Enhanced E-commerce Tracking
- Enable Data Layer: I ensured that the Shopify data layer was enabled for e-commerce tracking by adjusting the settings in Shopify.
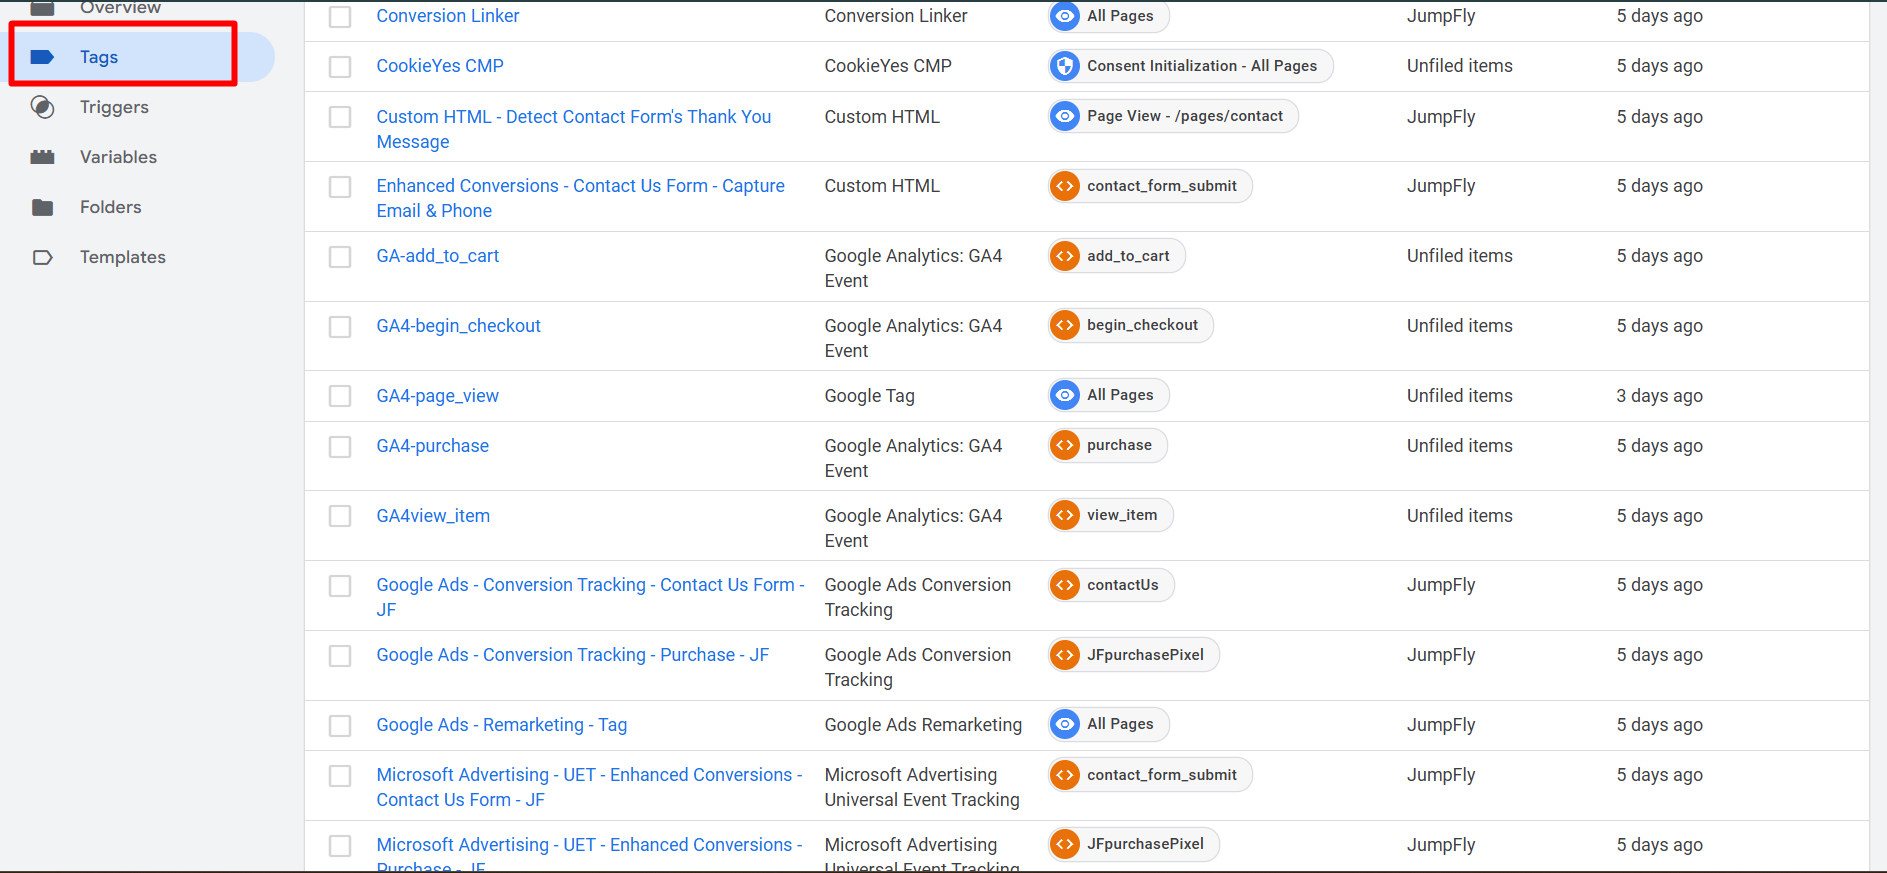
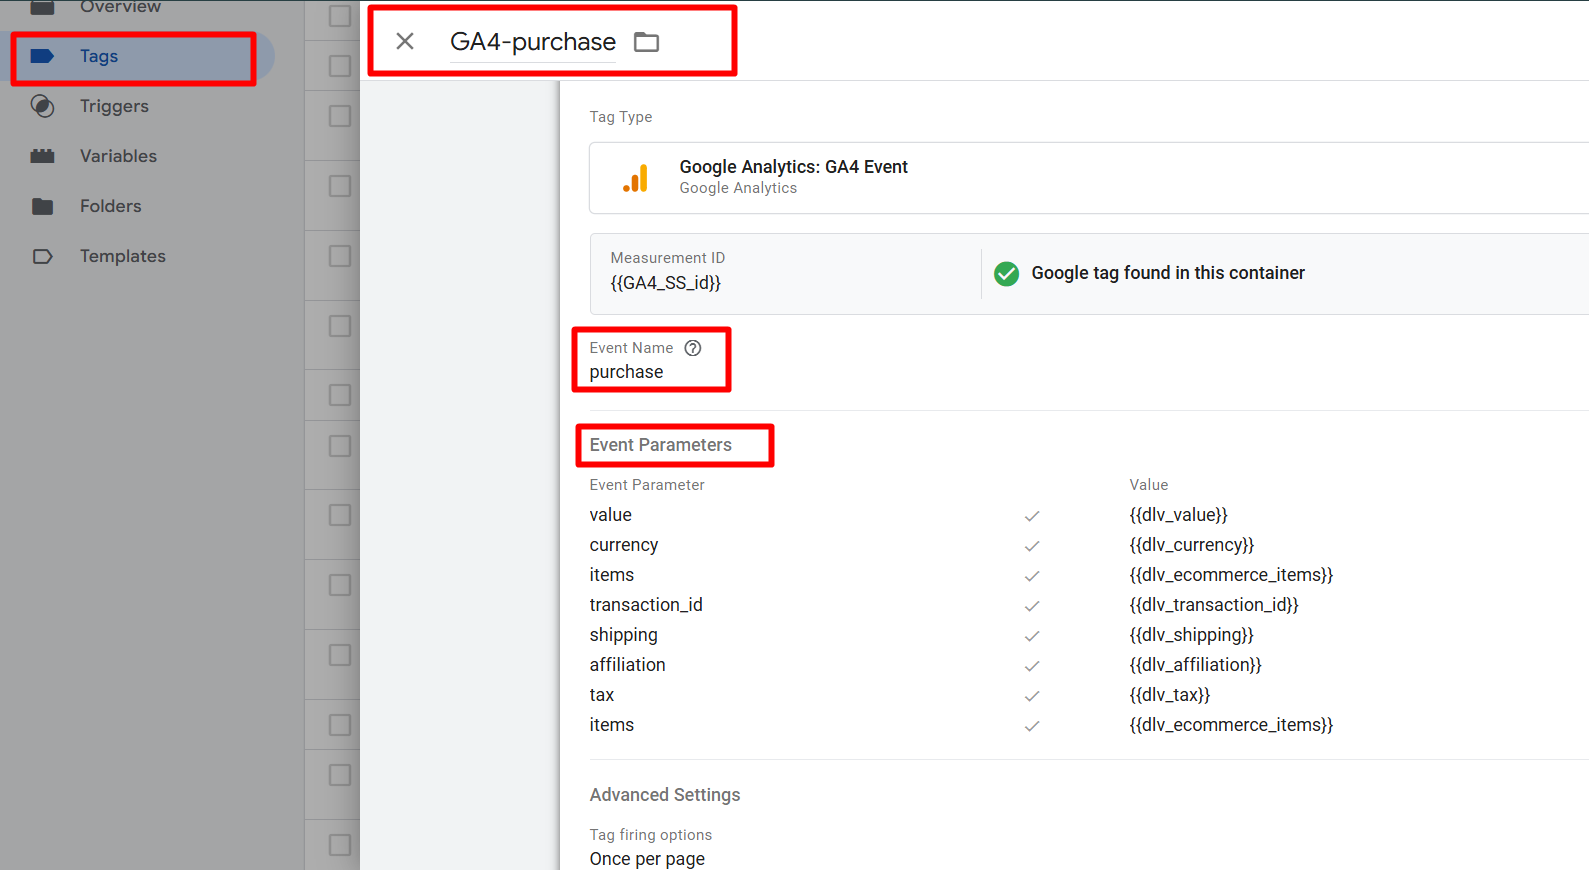
- Create Event Tags: In GTM, I created event tags for key user interactions like product views, add-to-cart actions, and purchases, aligning them with GA4 event types.
- Configure Triggers and Variables: I set up appropriate triggers based on data layer variables to fire these event tags accurately.
Step 5: Test the Implementation
- Use GTM Preview Mode: I switched GTM to preview mode and tested the setup by navigating through the Shopify site to verify that all tags and triggers fired correctly.
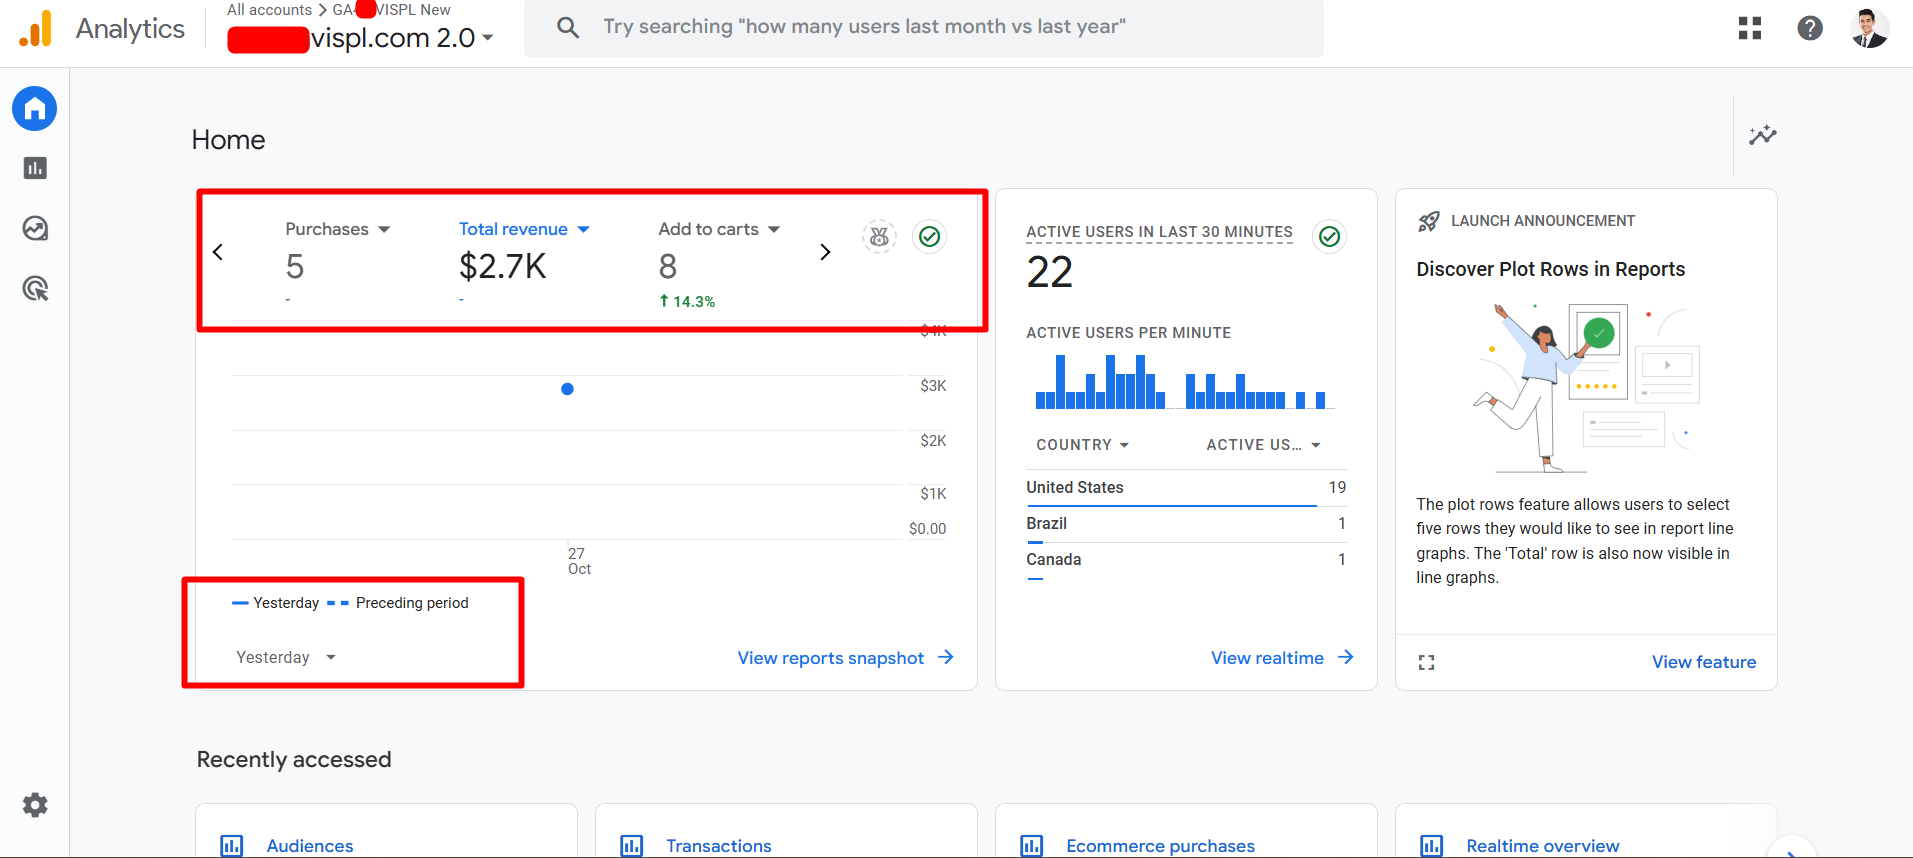
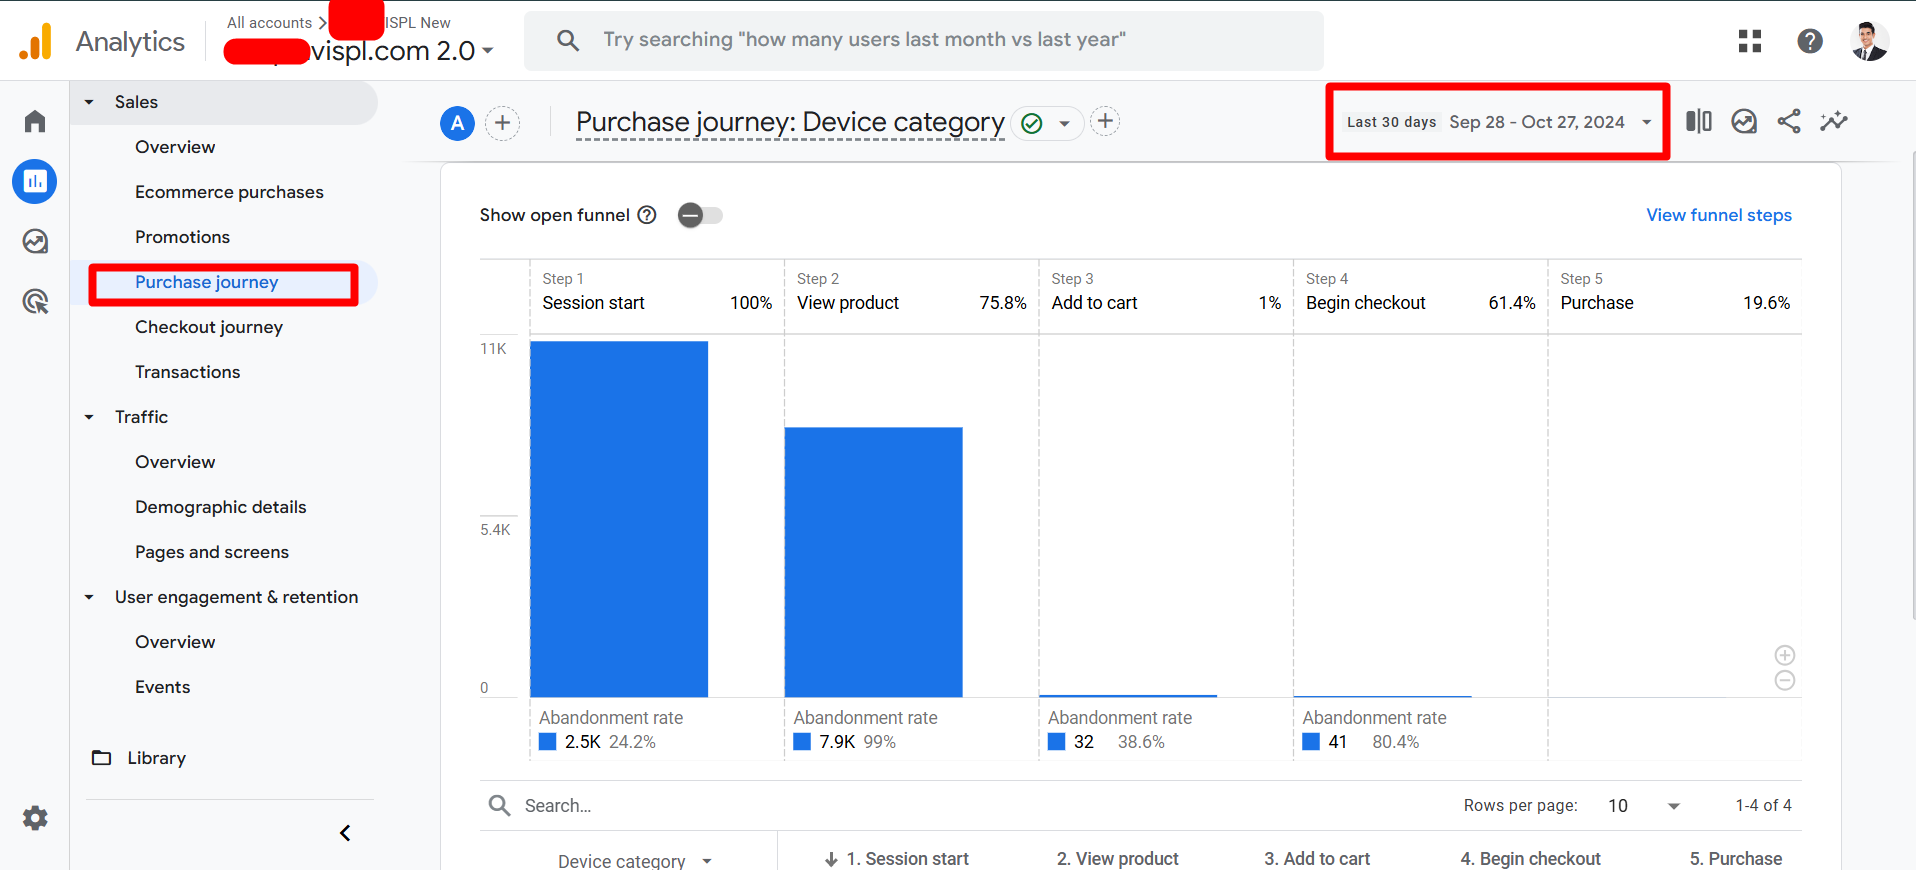
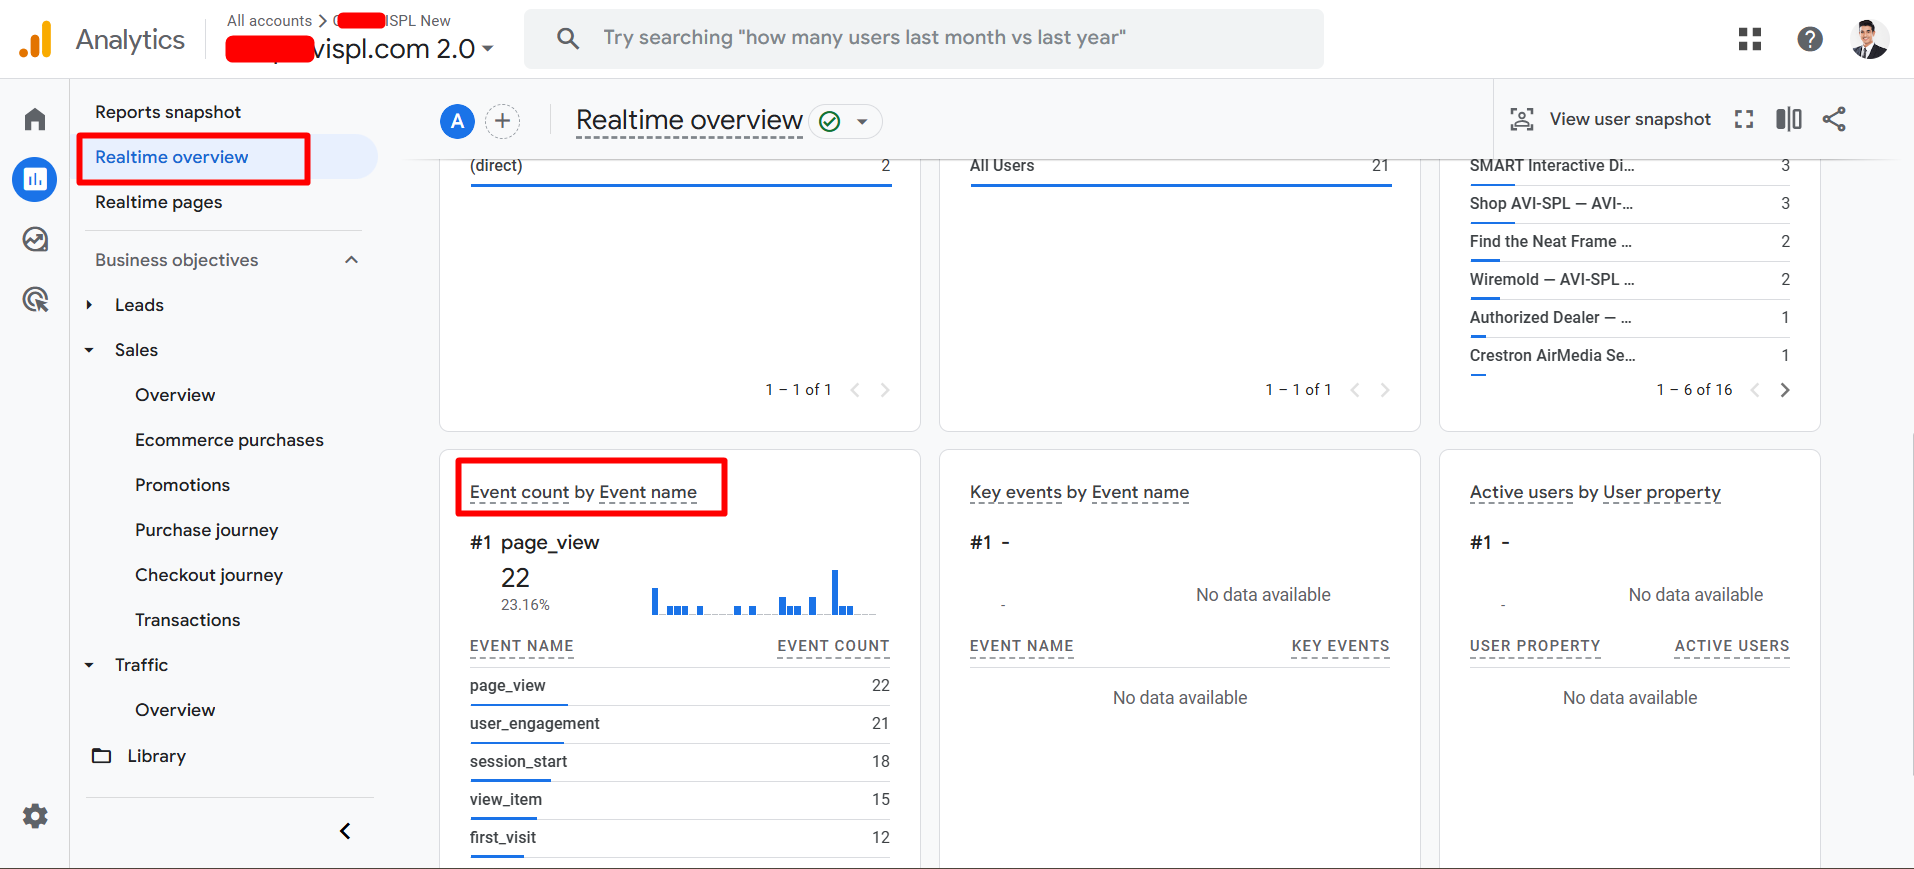
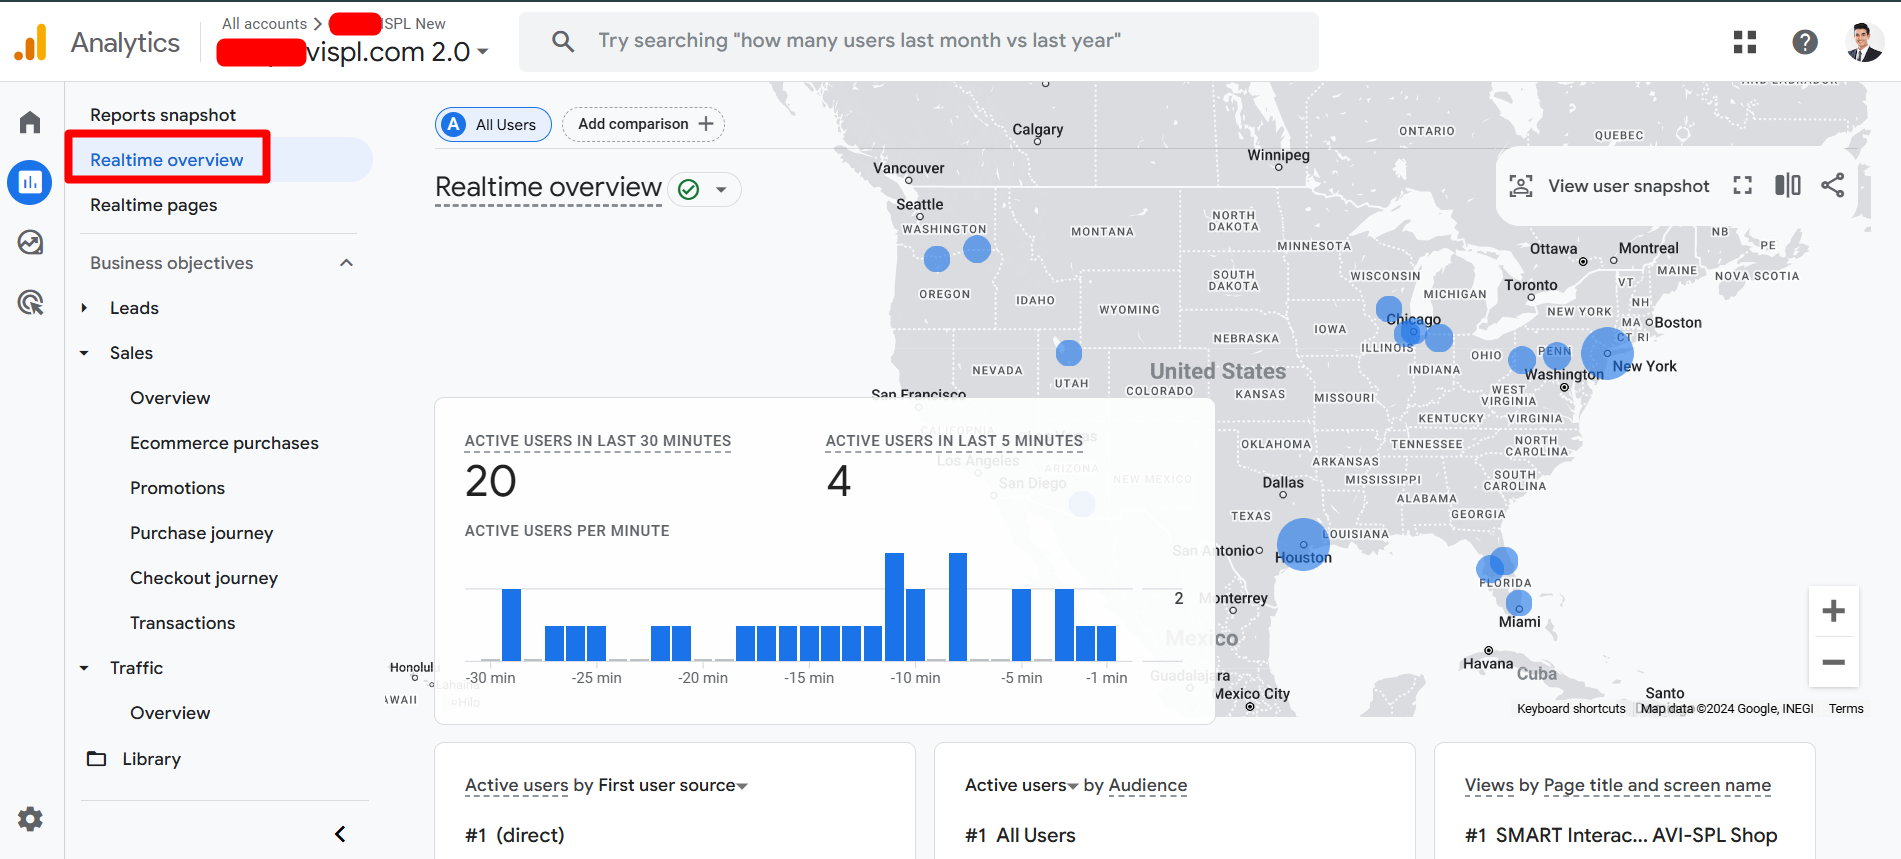
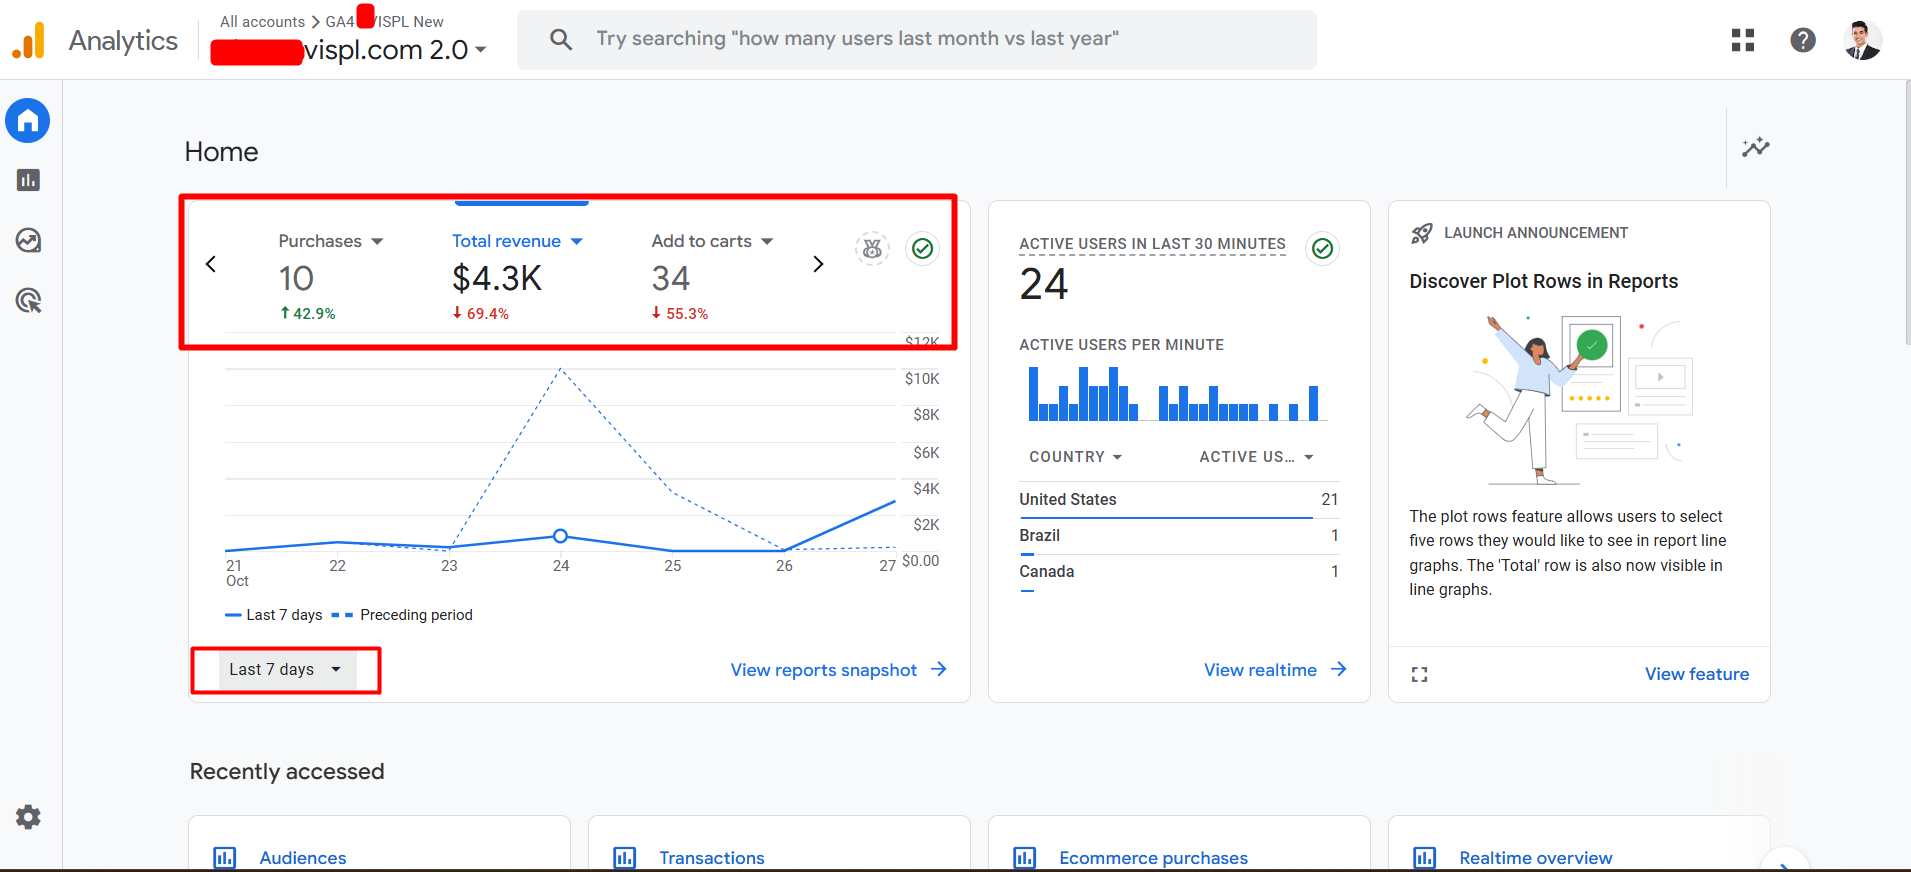
- Check GA4 Realtime Reports: I monitored the real-time reports in GA4 to ensure events were being recorded accurately.
Step 6: Publish the Container
- Review Changes: After thorough testing and validation, I reviewed all tags, triggers, and variables in GTM for accuracy.
- Publish: Once confirmed, I published the GTM container to make the setup live.
Step 7: Monitor and Optimize
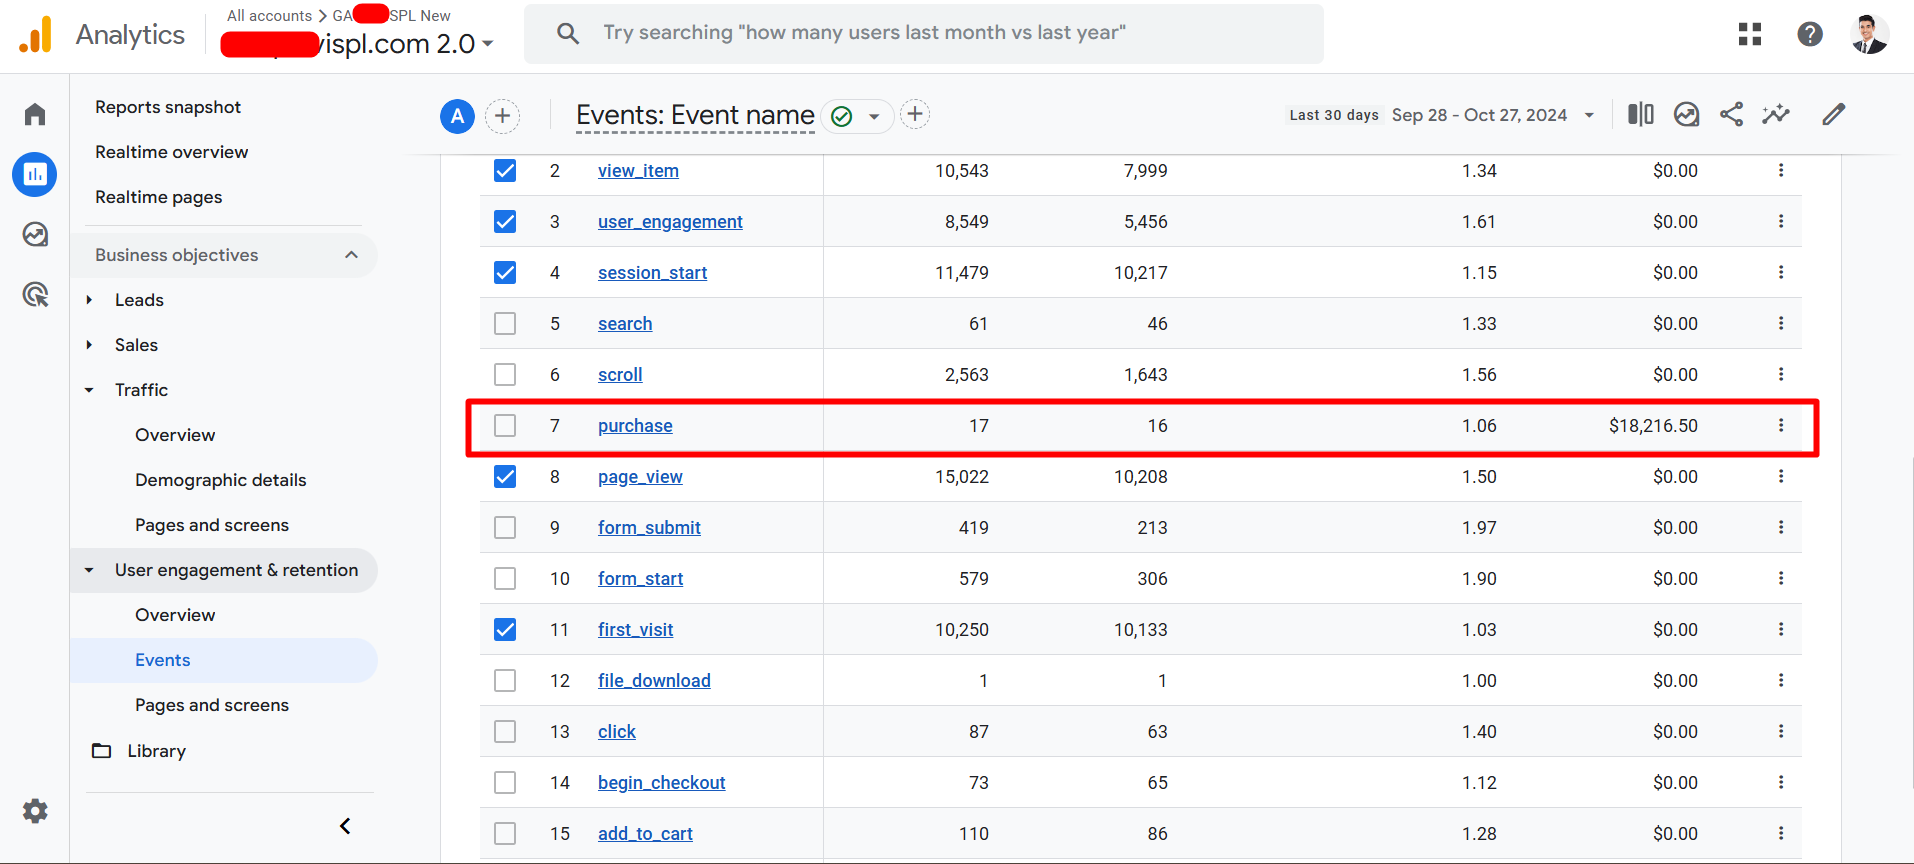
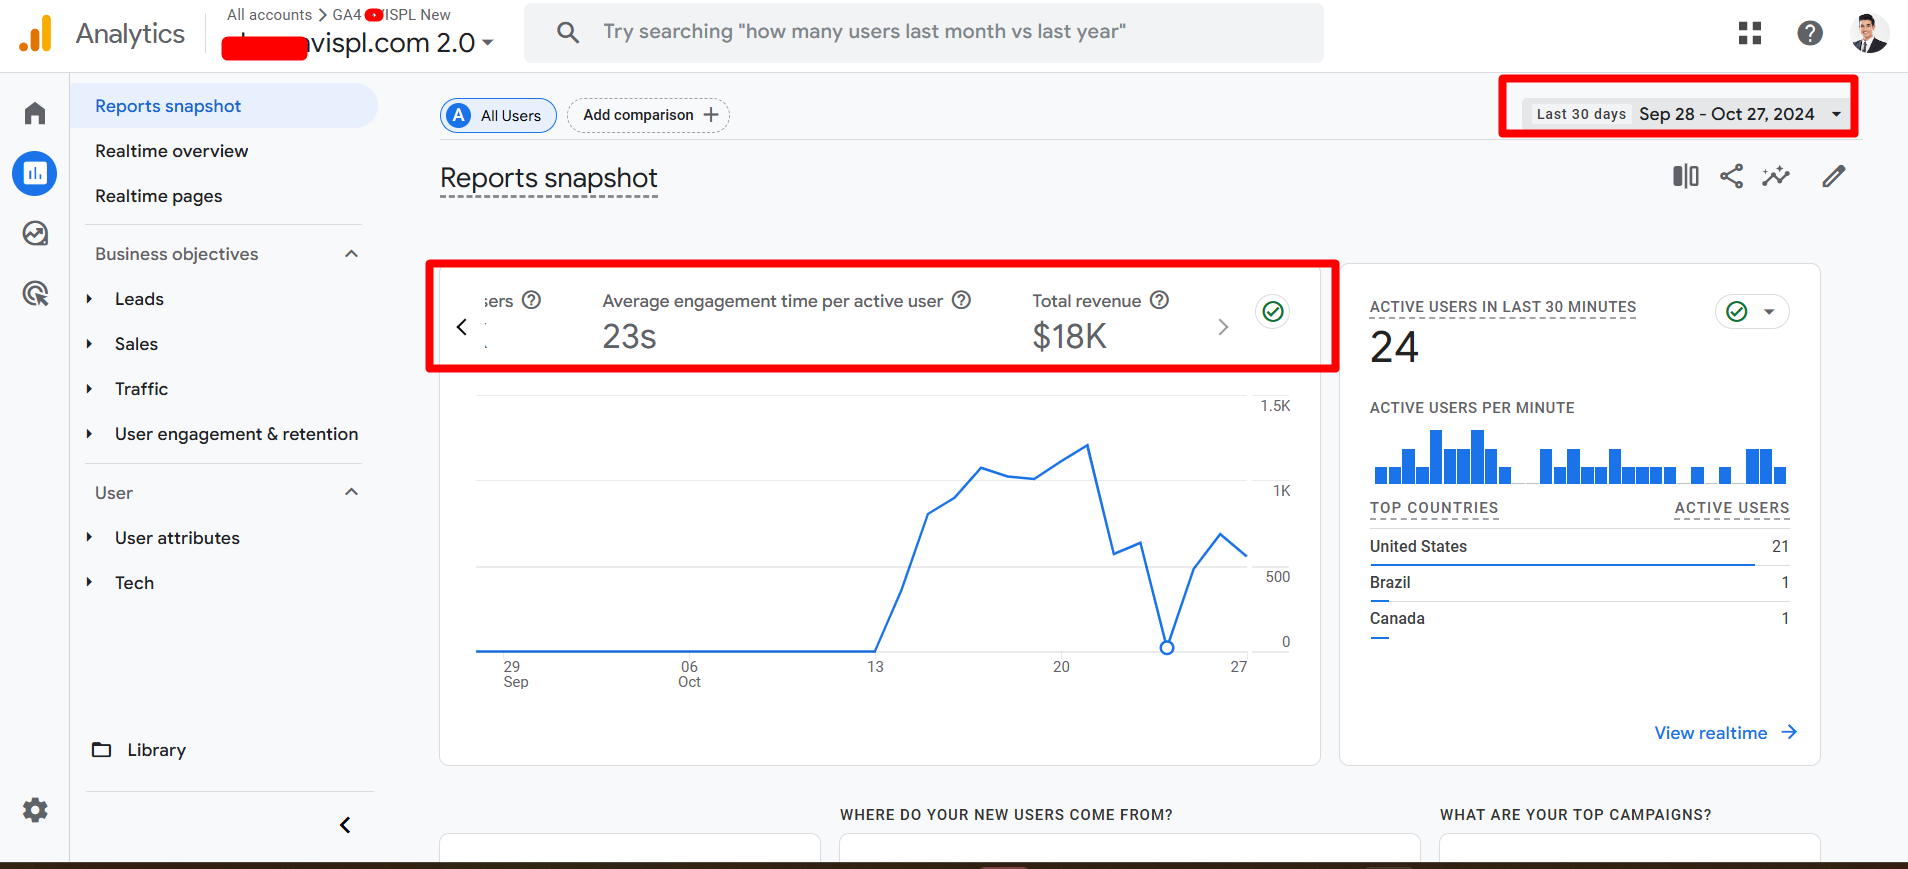
- Regular Monitoring: Post-implementation, I regularly monitored the GA4 reports to ensure continuous data accuracy.
- Adjust and Optimize: Based on insights from GA4, I made ongoing adjustments to refine the tracking setup, enhancing our understanding of user behavior and improving marketing strategies.
By following these steps, I successfully implemented GA4 tracking on a Shopify website using Google Tag Manager, achieving accurate data collection and valuable insights into user interactions. This experience not only enhanced the website’s analytics capabilities but also provided a solid foundation for optimizing marketing efforts. If you have any questions or need further details, feel free to reach out. Happy tracking!


