
Shopify Store: Step-by-Step Guide to Tracking Purchase Events with Google Tag Manager
In today’s digital landscape, accurate event tracking is crucial for understanding customer behavior and optimizing marketing strategies. If you’re running a Shopify store, configuring precise tracking for purchase events across multiple platforms can significantly enhance your insights and campaign effectiveness. This guide will walk you through the process of setting up purchase event tracking using Google Tag Manager (GTM) for Google Analytics 4 (GA4), Google Ads, and Meta Pixel (Facebook Pixel).
Steps to Add Data Layer Code Snippet to a Custom Pixel in Shopify
Access Shopify Admin:
Log in to your Shopify admin panel.
Navigate to Customer Events:
Go to Settings > Customer Events.
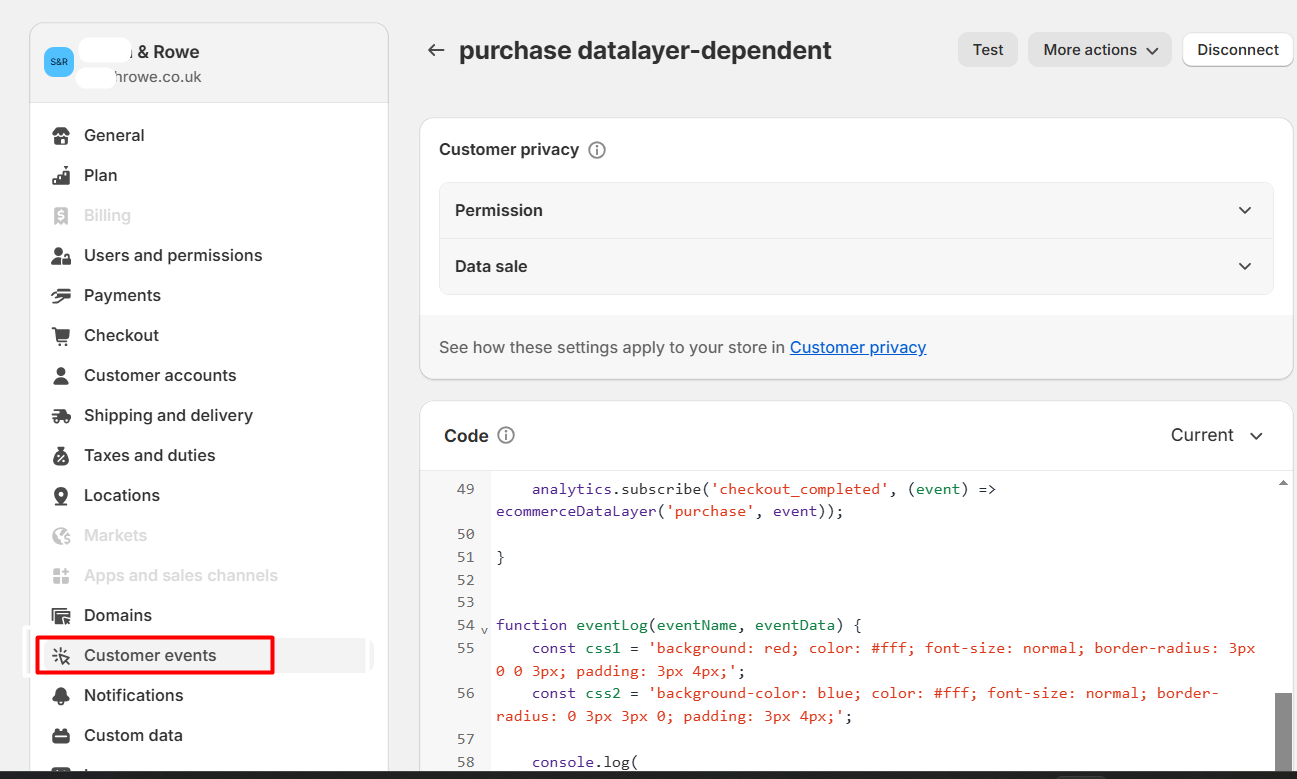
Create a New Pixel:
Click Add Pixel.
Give your pixel a distinctive name like purchase datalayer.
Add Data Layer Code:
In the Code window, paste your Data Layer code snippet
const event_prefix = ”;
const formattedItemId = true;
const gclidWithPageLocation = true;
const GTM_container_url = ‘https://www.googletagmanager.com’;
const GTM_container_id = ‘GTM-00000000’;
let storeCountryCode = window.localStorage.getItem(‘shopCountryCode’);
storeCountryCode = storeCountryCode || ‘US’;
window.dataLayer = window.dataLayer || [];
function gtag() {
dataLayer.push(arguments);
}
//checkout pages event
if(/.+\/checkouts?\/.*/.test(window.location.href)) {
// tag manager
(function(w, d, s, l, i) {
w[l] = w[l] || [];
w[l].push({
‘gtm.start’: new Date().getTime(),
event: ‘gtm.js’
});
var f = d.getElementsByTagName(s)[0],
j = d.createElement(s),
dl = l != ‘dataLayer’ ? ‘&l=’ + l : ”;
j.async = true;
j.src = GTM_container_url + ‘/gtm.js?id=’ + i + dl;
f.parentNode.insertBefore(j, f);
})(window, document, ‘script’, ‘dataLayer’, GTM_container_id);
analytics.subscribe(‘page_viewed’, (event) => {
const eventData = {
event: event_prefix + ‘page_view’,
page_location: getPageLocation(event),
}
window.dataLayer.push(eventData);
eventLog(‘page_view’, eventData);
});
// end tag manager
// DataLayer Events
analytics.subscribe(‘payment_info_submitted’, (event) => ecommerceDataLayer(‘add_payment_info’, event));
analytics.subscribe(‘checkout_shipping_info_submitted’, (event) => ecommerceDataLayer(‘add_shipping_info’, event));
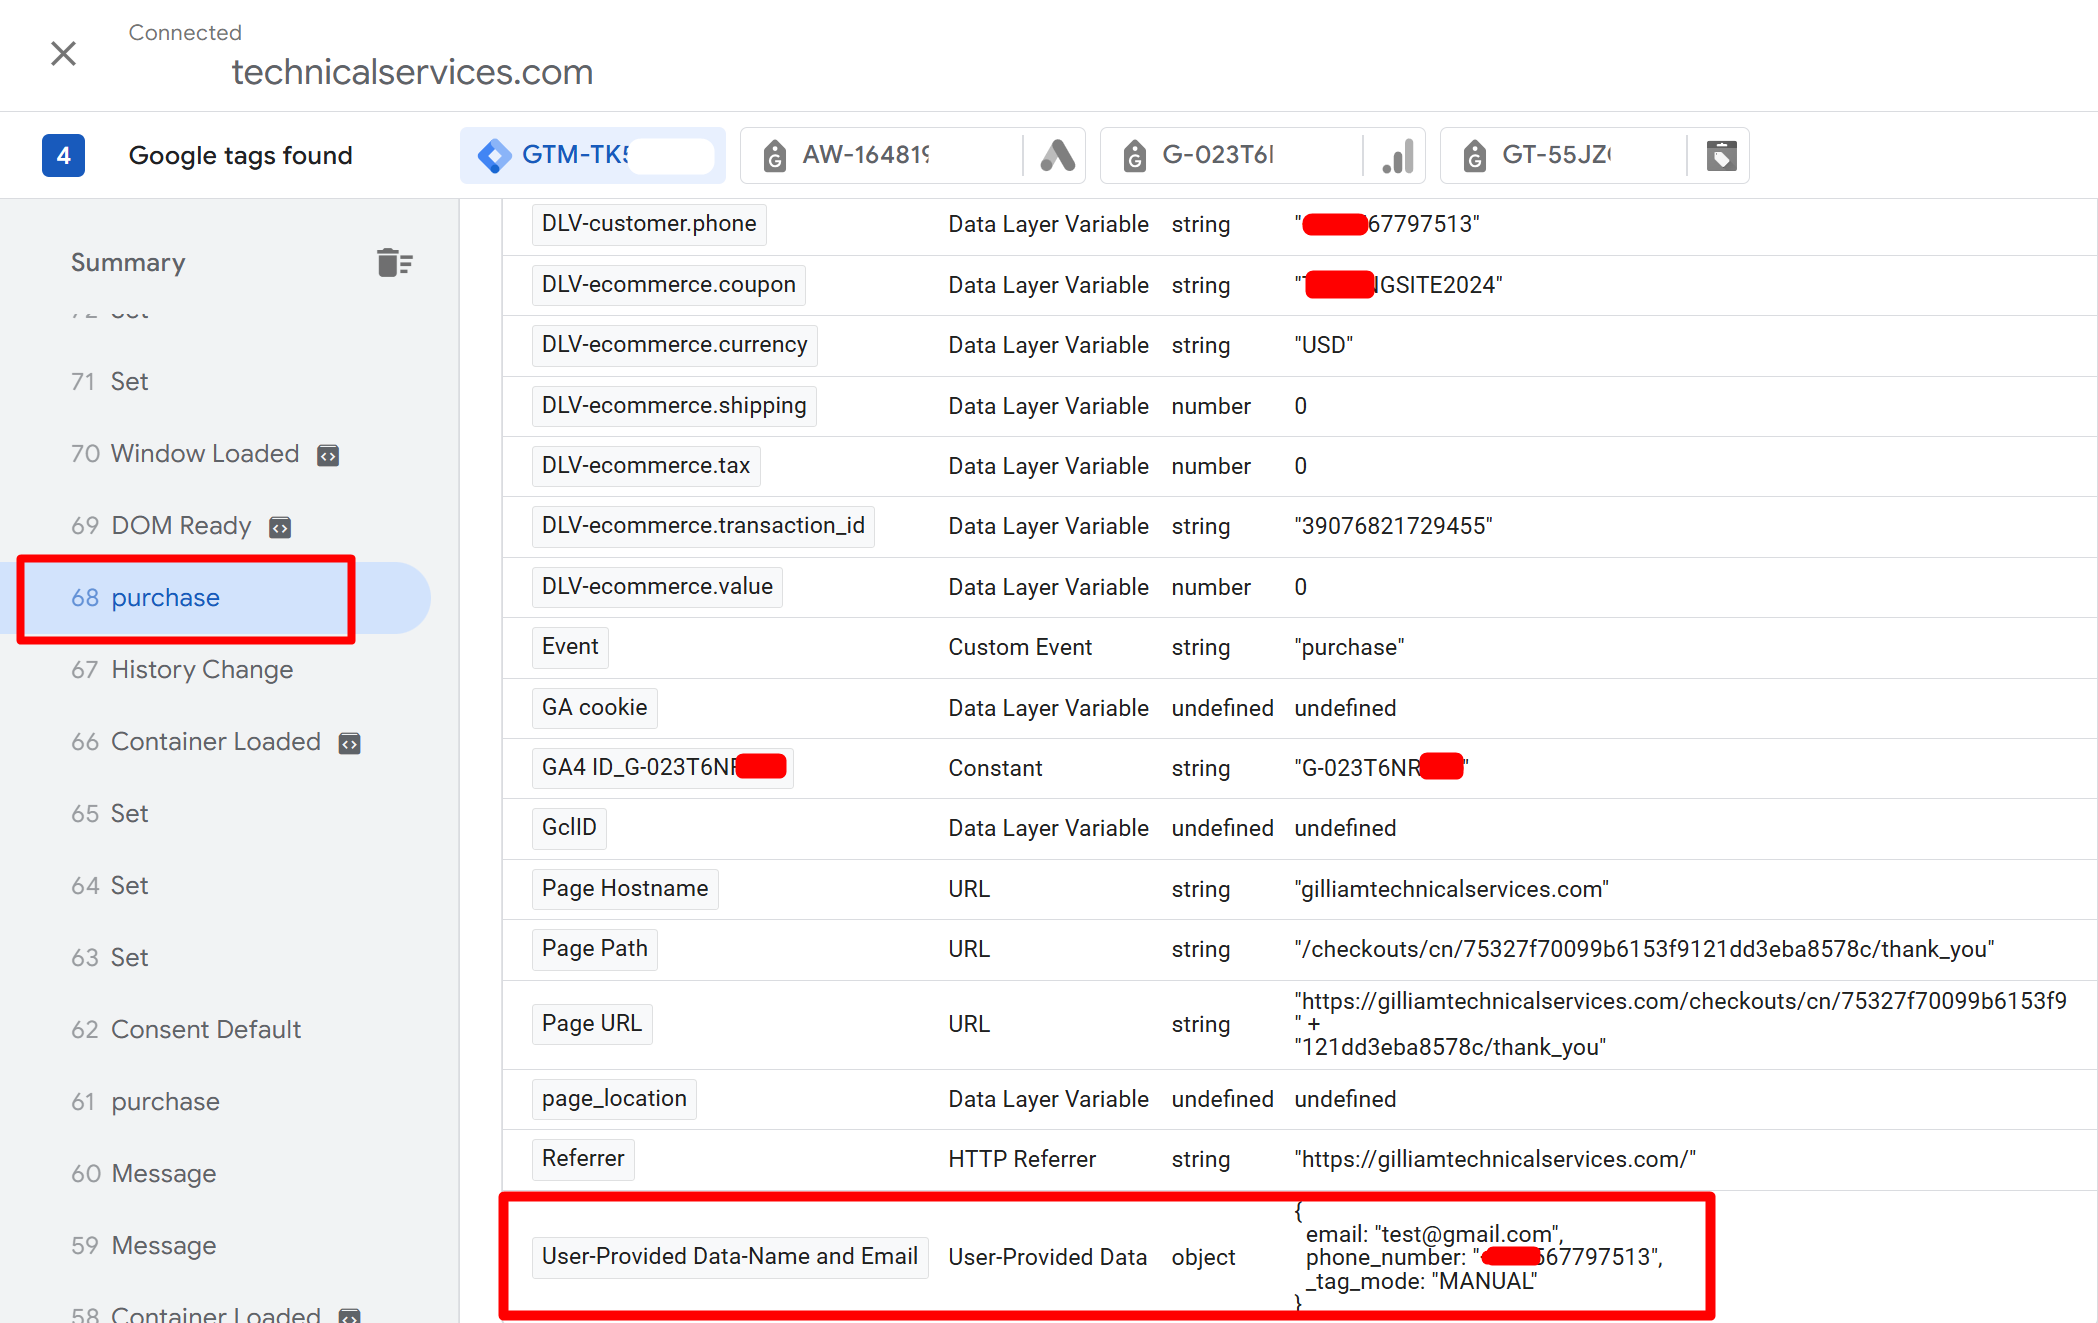
analytics.subscribe(‘checkout_completed’, (event) => ecommerceDataLayer(‘purchase’, event));
}
function eventLog(eventName, eventData) {
const css1 = ‘background: red; color: #fff; font-size: normal; border-radius: 3px 0 0 3px; padding: 3px 4px;’;
const css2 = ‘background-color: blue; color: #fff; font-size: normal; border-radius: 0 3px 3px 0; padding: 3px 4px;’;
console.log(
‘%cGTM DataLayer Event:%c’ + event_prefix + eventName, css1, css2, eventData
);
}
function getPageLocation(event) {
let pageLocation = event.context.document.location.href;
if(gclidWithPageLocation) {
const name = ‘_gcl_aw’;
const value = `; ${document.cookie}`;
const parts = value.split(`; ${name}=`);
if (parts.length === 2) {
const gclidCookie = parts.pop().split(‘;’).shift();
const gclidParts = gclidCookie.split(‘.’);
const gclid = gclidParts[gclidParts.length – 1];
pageLocation = pageLocation.includes(‘?’) ? `${pageLocation}&gclid=${gclid}` : `${pageLocation}?gclid=${gclid}`;
}
}
return pageLocation;
}
async function sha256Hash(value) {
const encoder = new TextEncoder();
const data = encoder.encode(value);
const hashBuffer = await crypto.subtle.digest(‘SHA-256′, data);
const hashArray = Array.from(new Uint8Array(hashBuffer));
const hashedValue = hashArray.map(byte => (’00’ + byte.toString(16)).slice(-2)).join(”);
return hashedValue;
}
async function ecommerceDataLayer(gtm_event_name, event) {
let hash_email;
let hash_phone;
const phone = event.data?.checkout?.phone;
const email = event.data?.checkout?.email;
if (phone) {
hash_phone = await sha256Hash(phone);
}
if (email) {
hash_email = await sha256Hash(email);
}
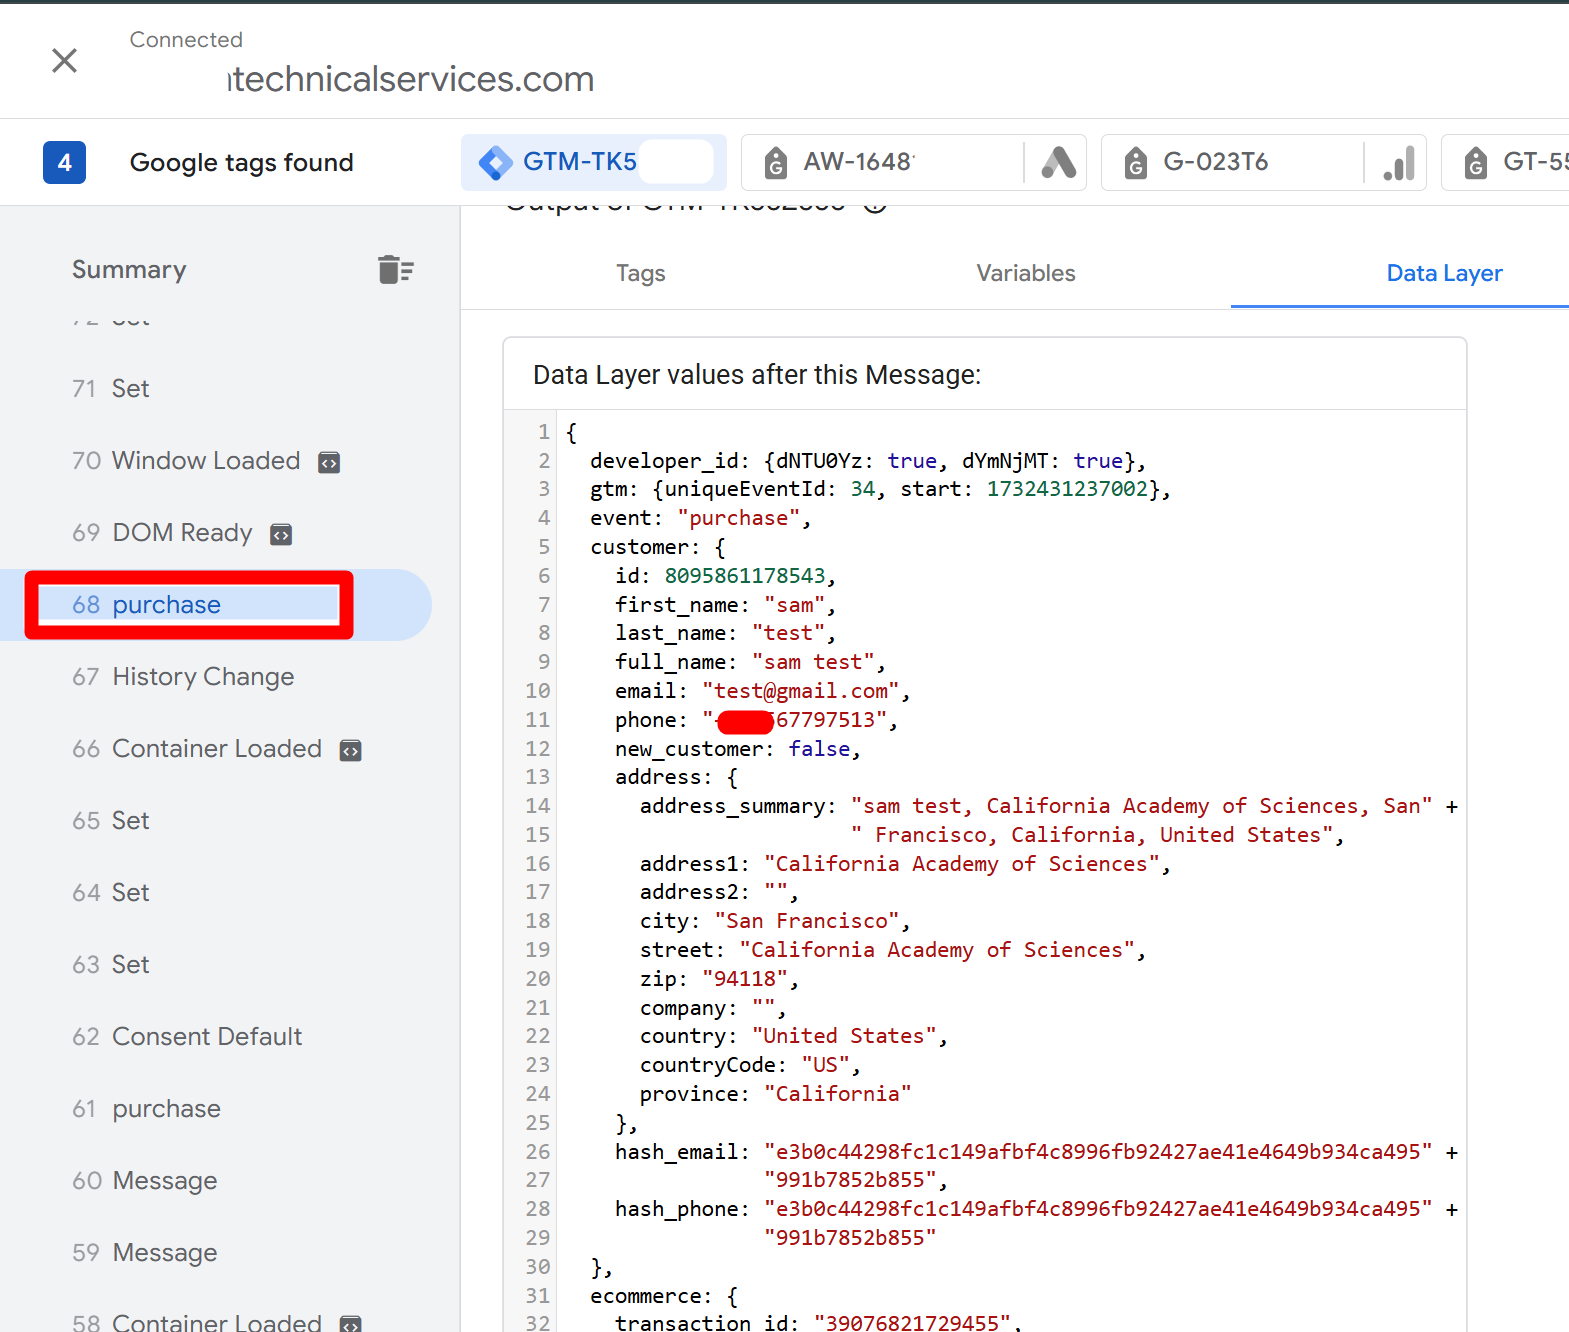
const customerInfo = {
customer: {
first_name: event.data?.checkout?.billingAddress?.firstName || event.data?.checkout?.shippingAddress?.firstName,
last_name: event.data?.checkout?.billingAddress?.lastName || event.data?.checkout?.shippingAddress?.lastName,
email: email,
hash_email: hash_email,
phone: phone,
hash_phone: hash_phone,
address: event.data?.checkout?.shippingAddress
}
}
dataLayer.push(customerInfo);
const dataLayerInfo = {
event: event_prefix + gtm_event_name,
page_location: getPageLocation(event),
ecommerce: {
transaction_id: event.data?.checkout?.order?.id,
value: event.data?.checkout?.totalPrice?.amount,
tax: event.data?.checkout?.totalTax?.amount,
shipping: event.data?.checkout?.shippingLine?.price?.amount,
currency: event.data?.checkout?.currencyCode,
coupon: (event.data?.checkout?.discountApplications || []).map(discount => discount.title).join(‘,’),
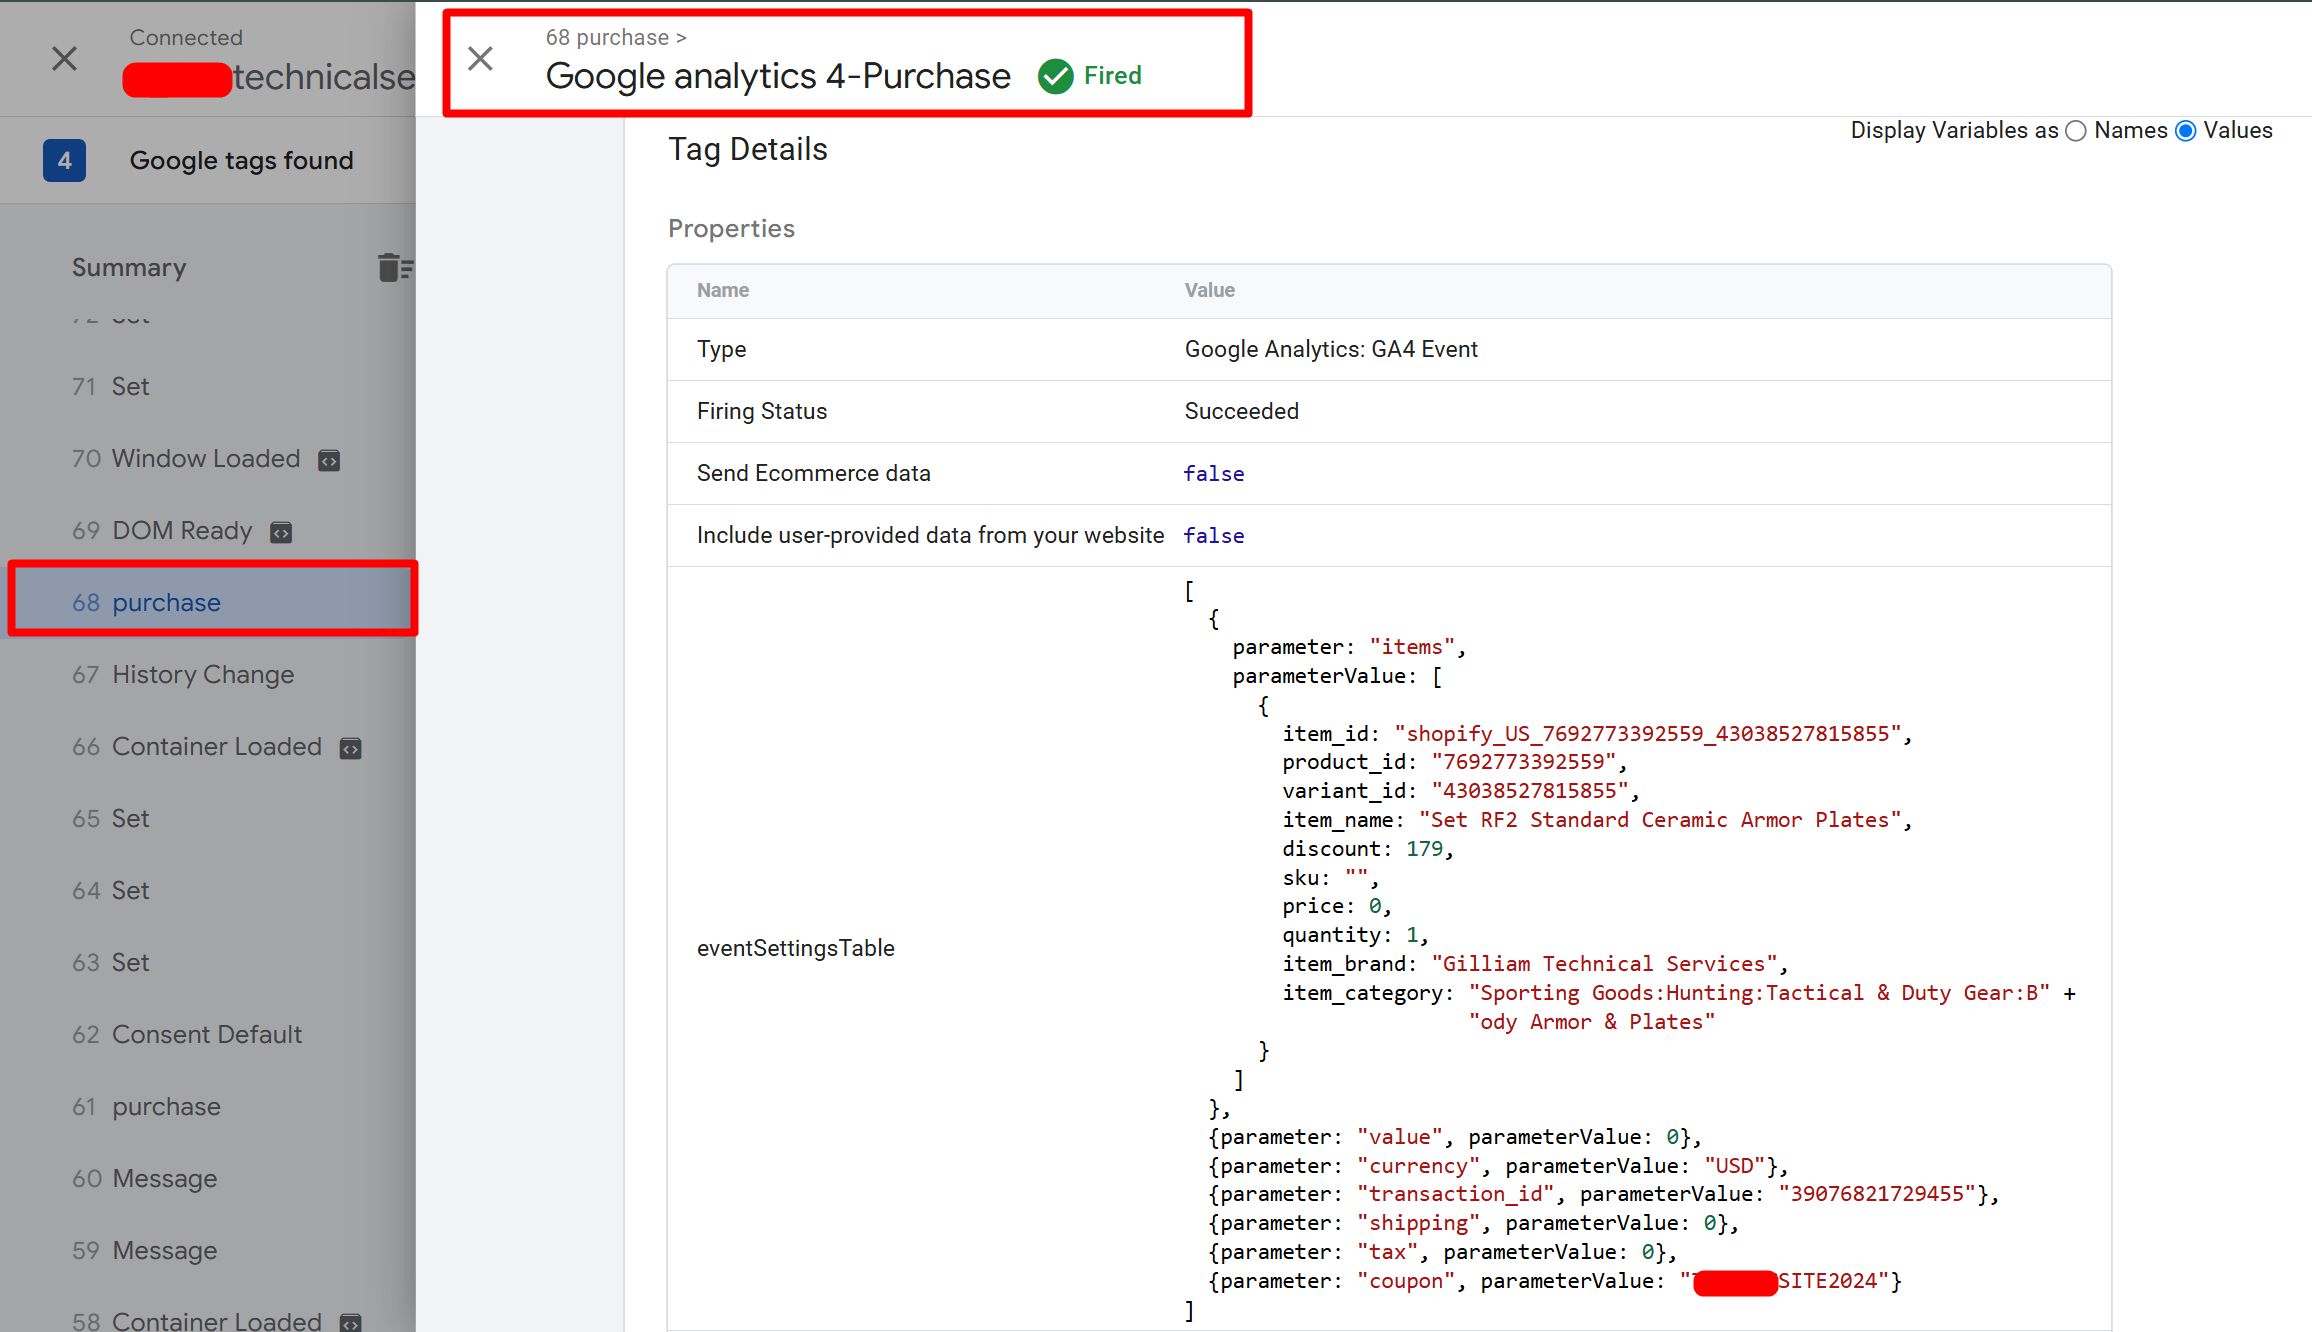
items: (event.data?.checkout?.lineItems || []).map(item => ({
item_id: formattedItemId ? ‘shopify_’ + storeCountryCode + ‘_’ + (item.variant?.product?.id || ”) + ‘_’ + (item.variant?.id || ”) : item.variant?.product?.id,
product_id: item.variant?.product?.id,
variant_id: item.variant?.id,
sku: item.variant?.sku,
item_name: item.title,
coupon: item.discountAllocations?.discountApplication?.title,
discount: item.discountAllocations?.amount?.amount,
item_variant: item.variant?.title,
price: item.variant?.price?.amount,
quantity: item.quantity,
item_brand: item.variant?.product?.vendor,
item_category: item.variant?.product?.type
}))
}
}
dataLayer.push({
ecommerce: null
});
dataLayer.push(dataLayerInfo);
eventLog(gtm_event_name, Object.assign({}, dataLayerInfo, customerInfo));
}
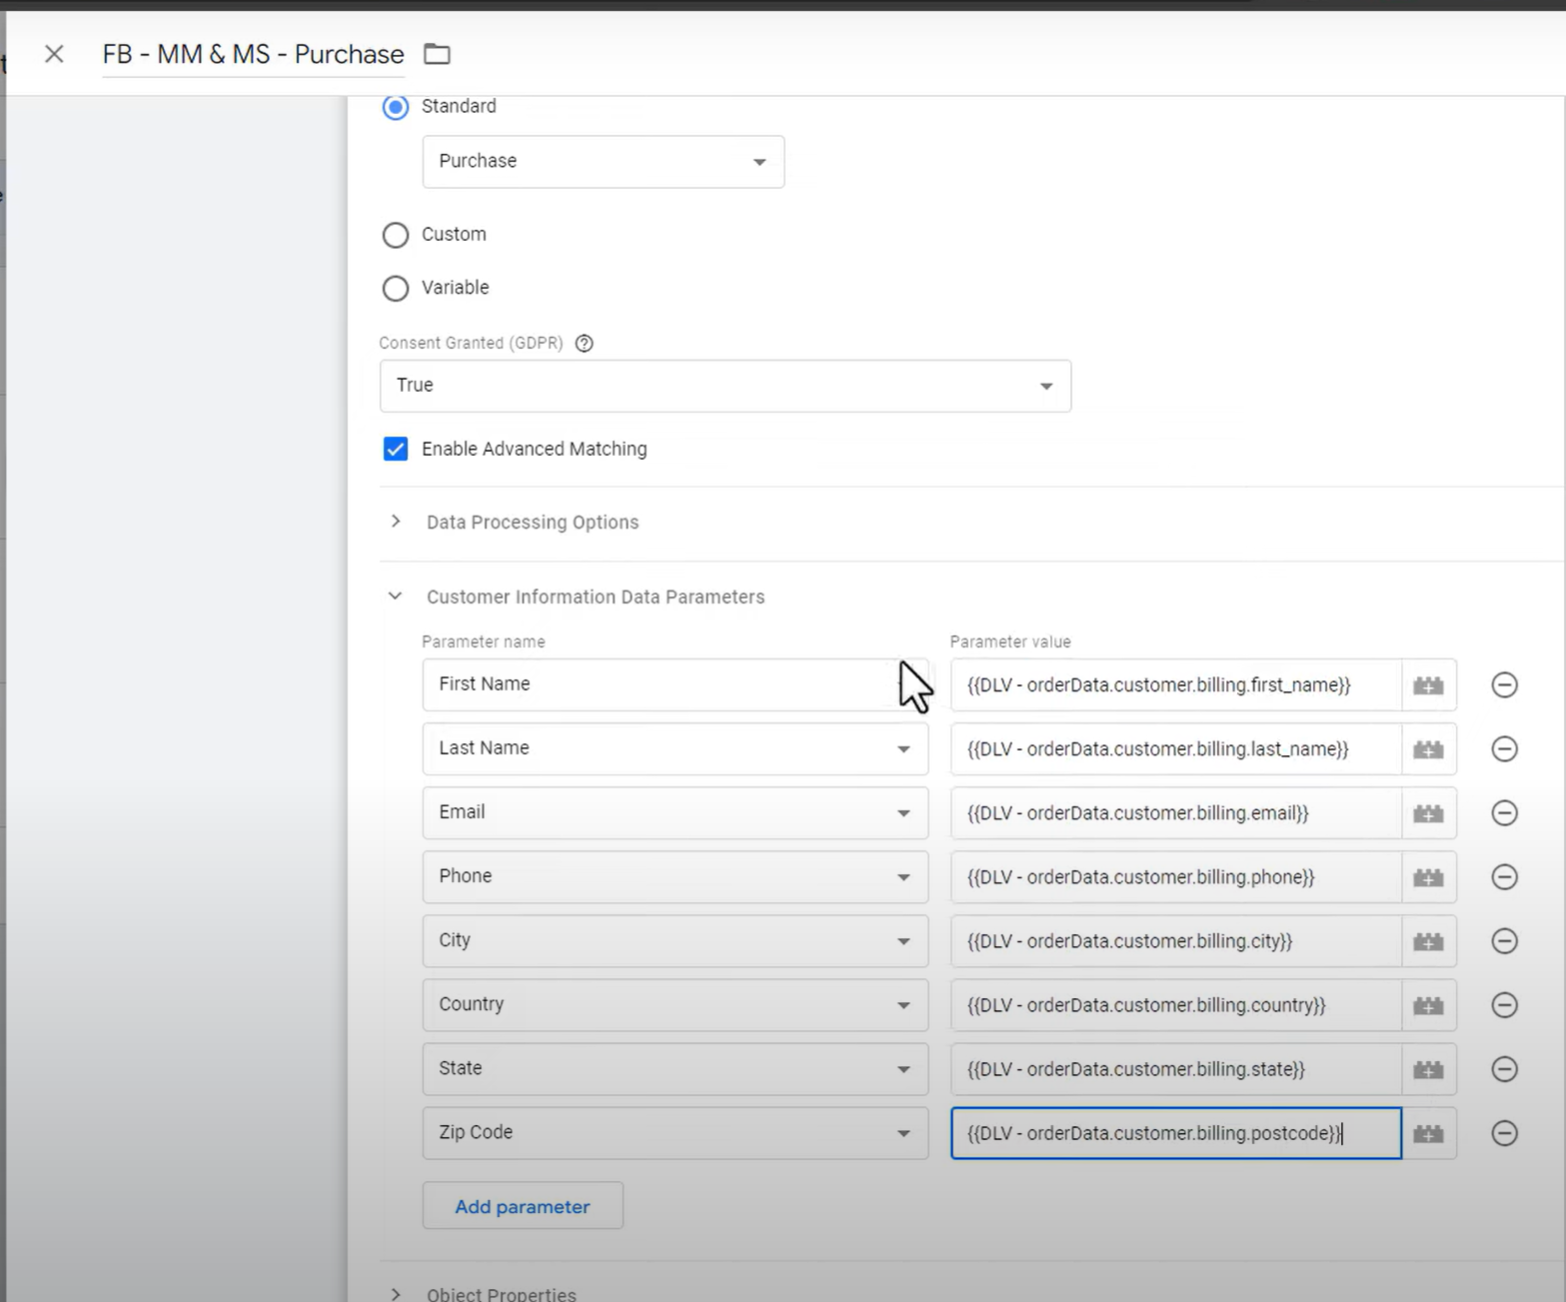
Configure GTM
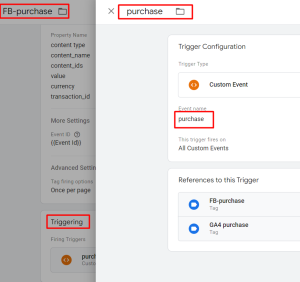
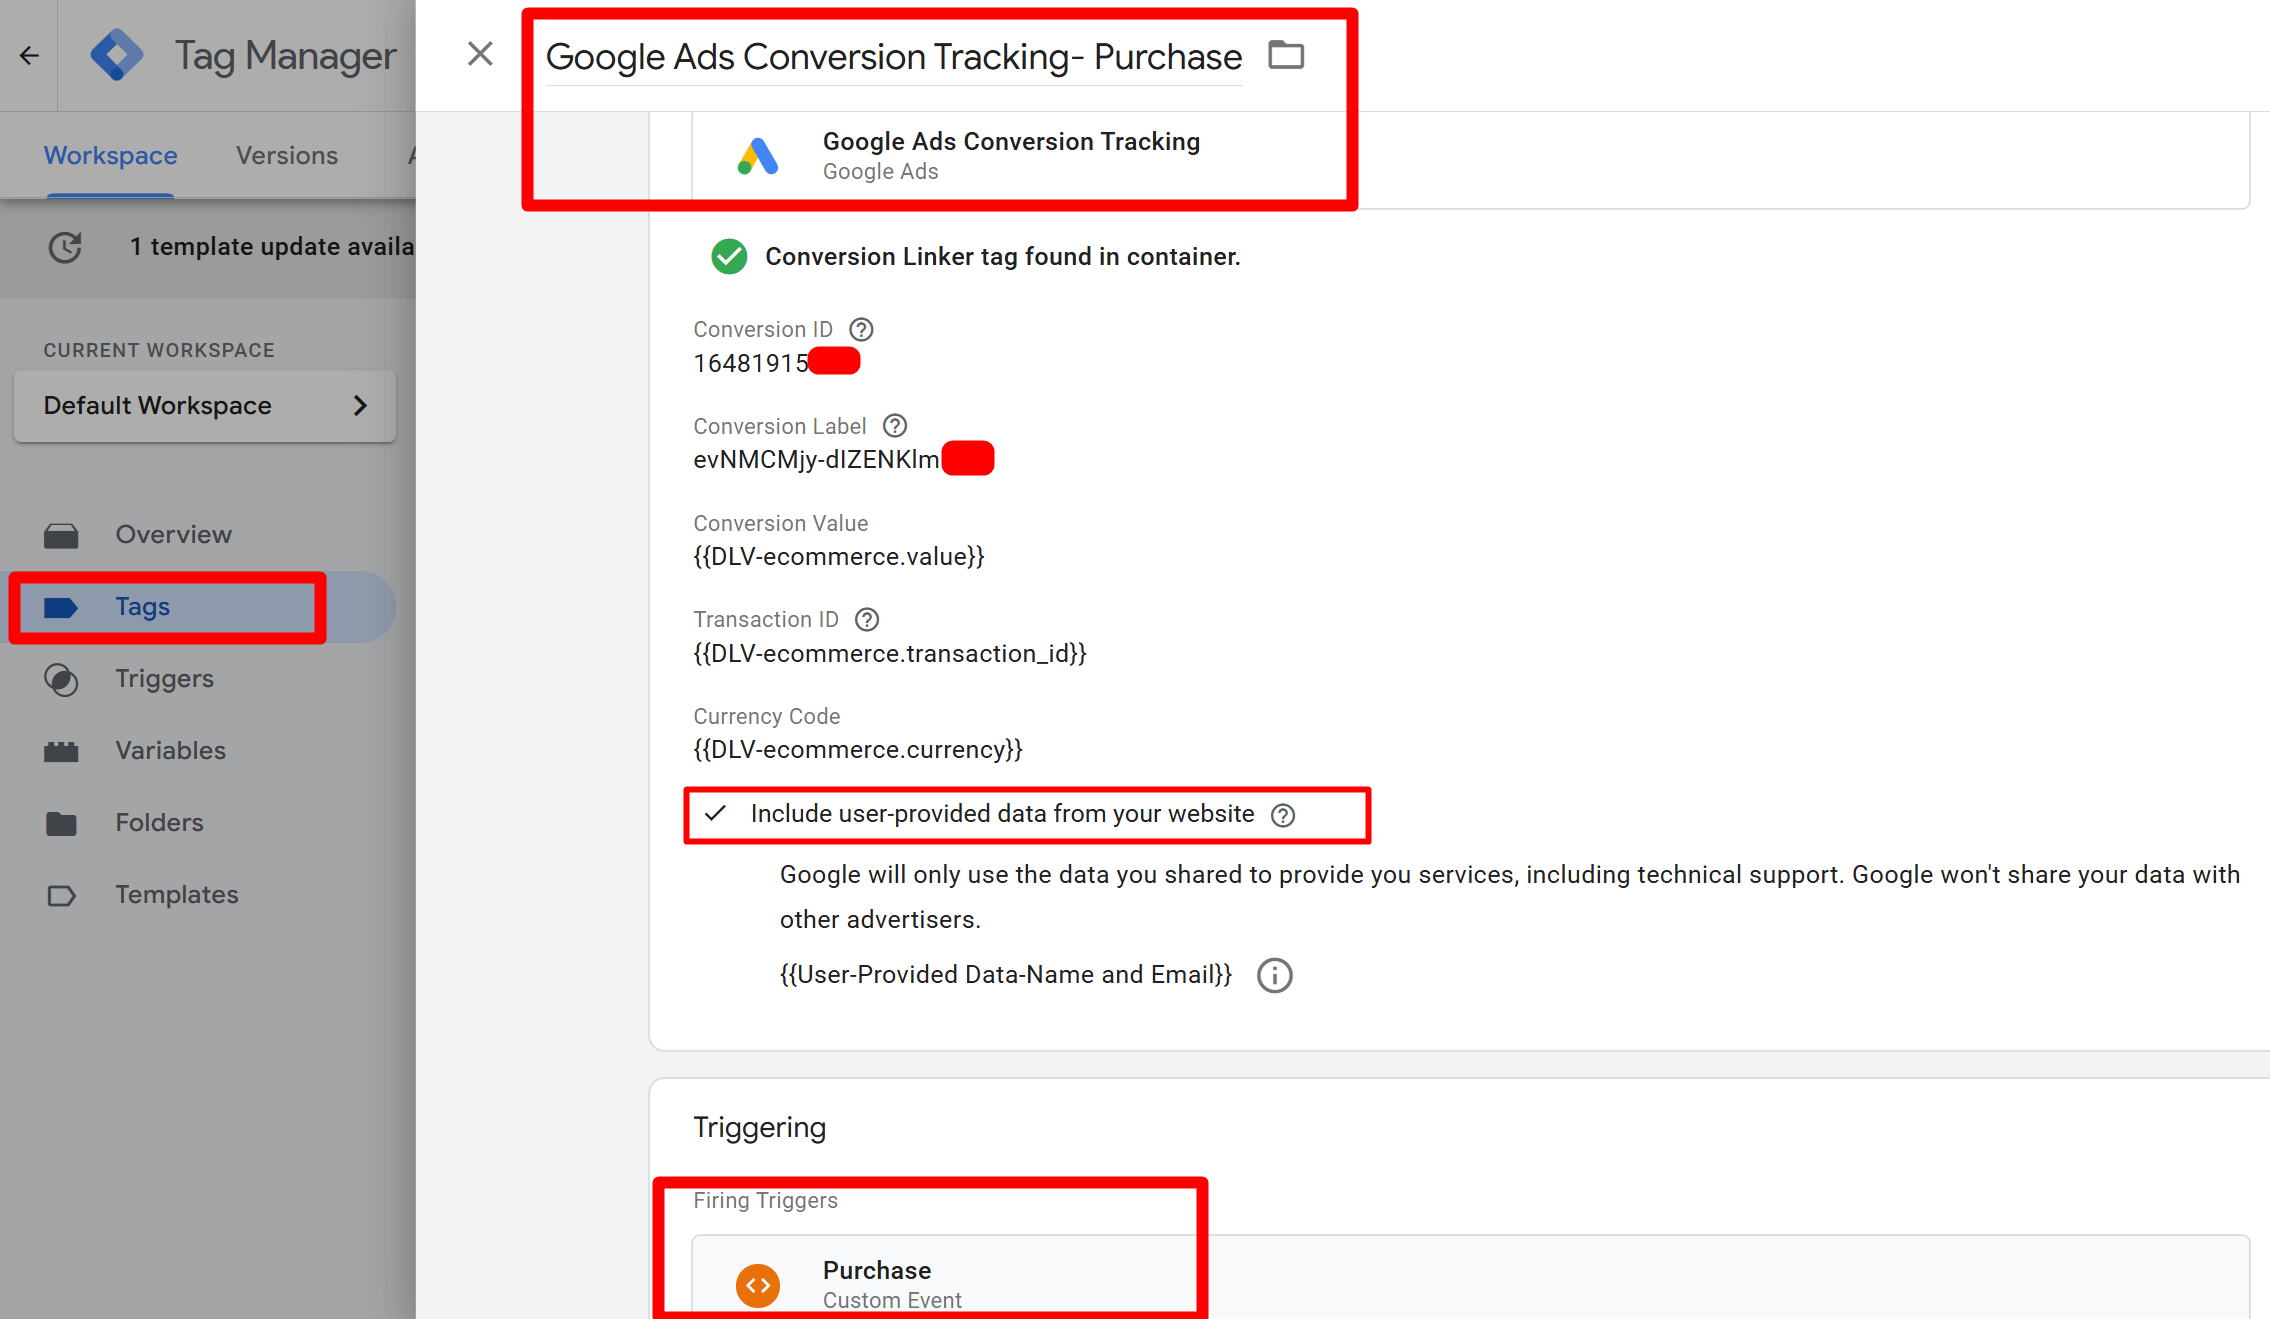
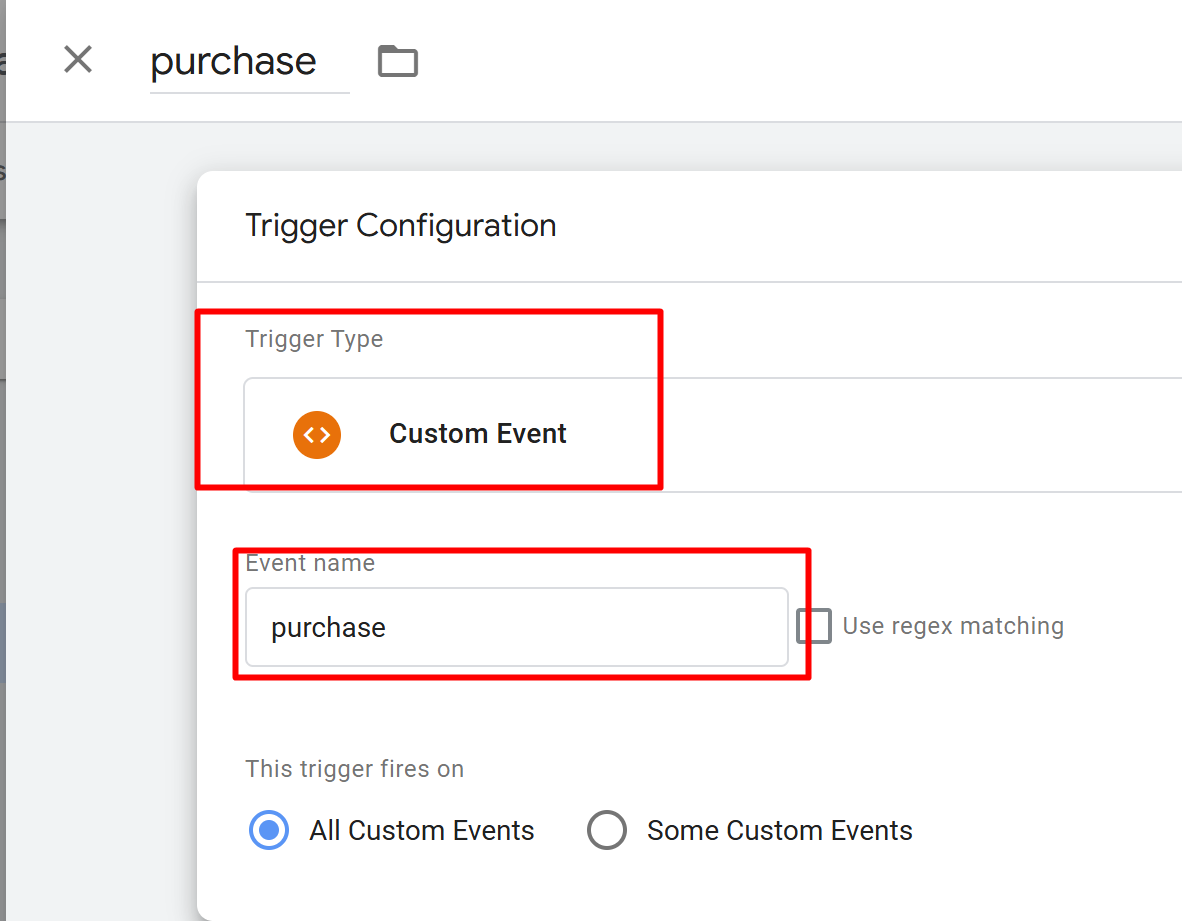
Set Up Triggers:
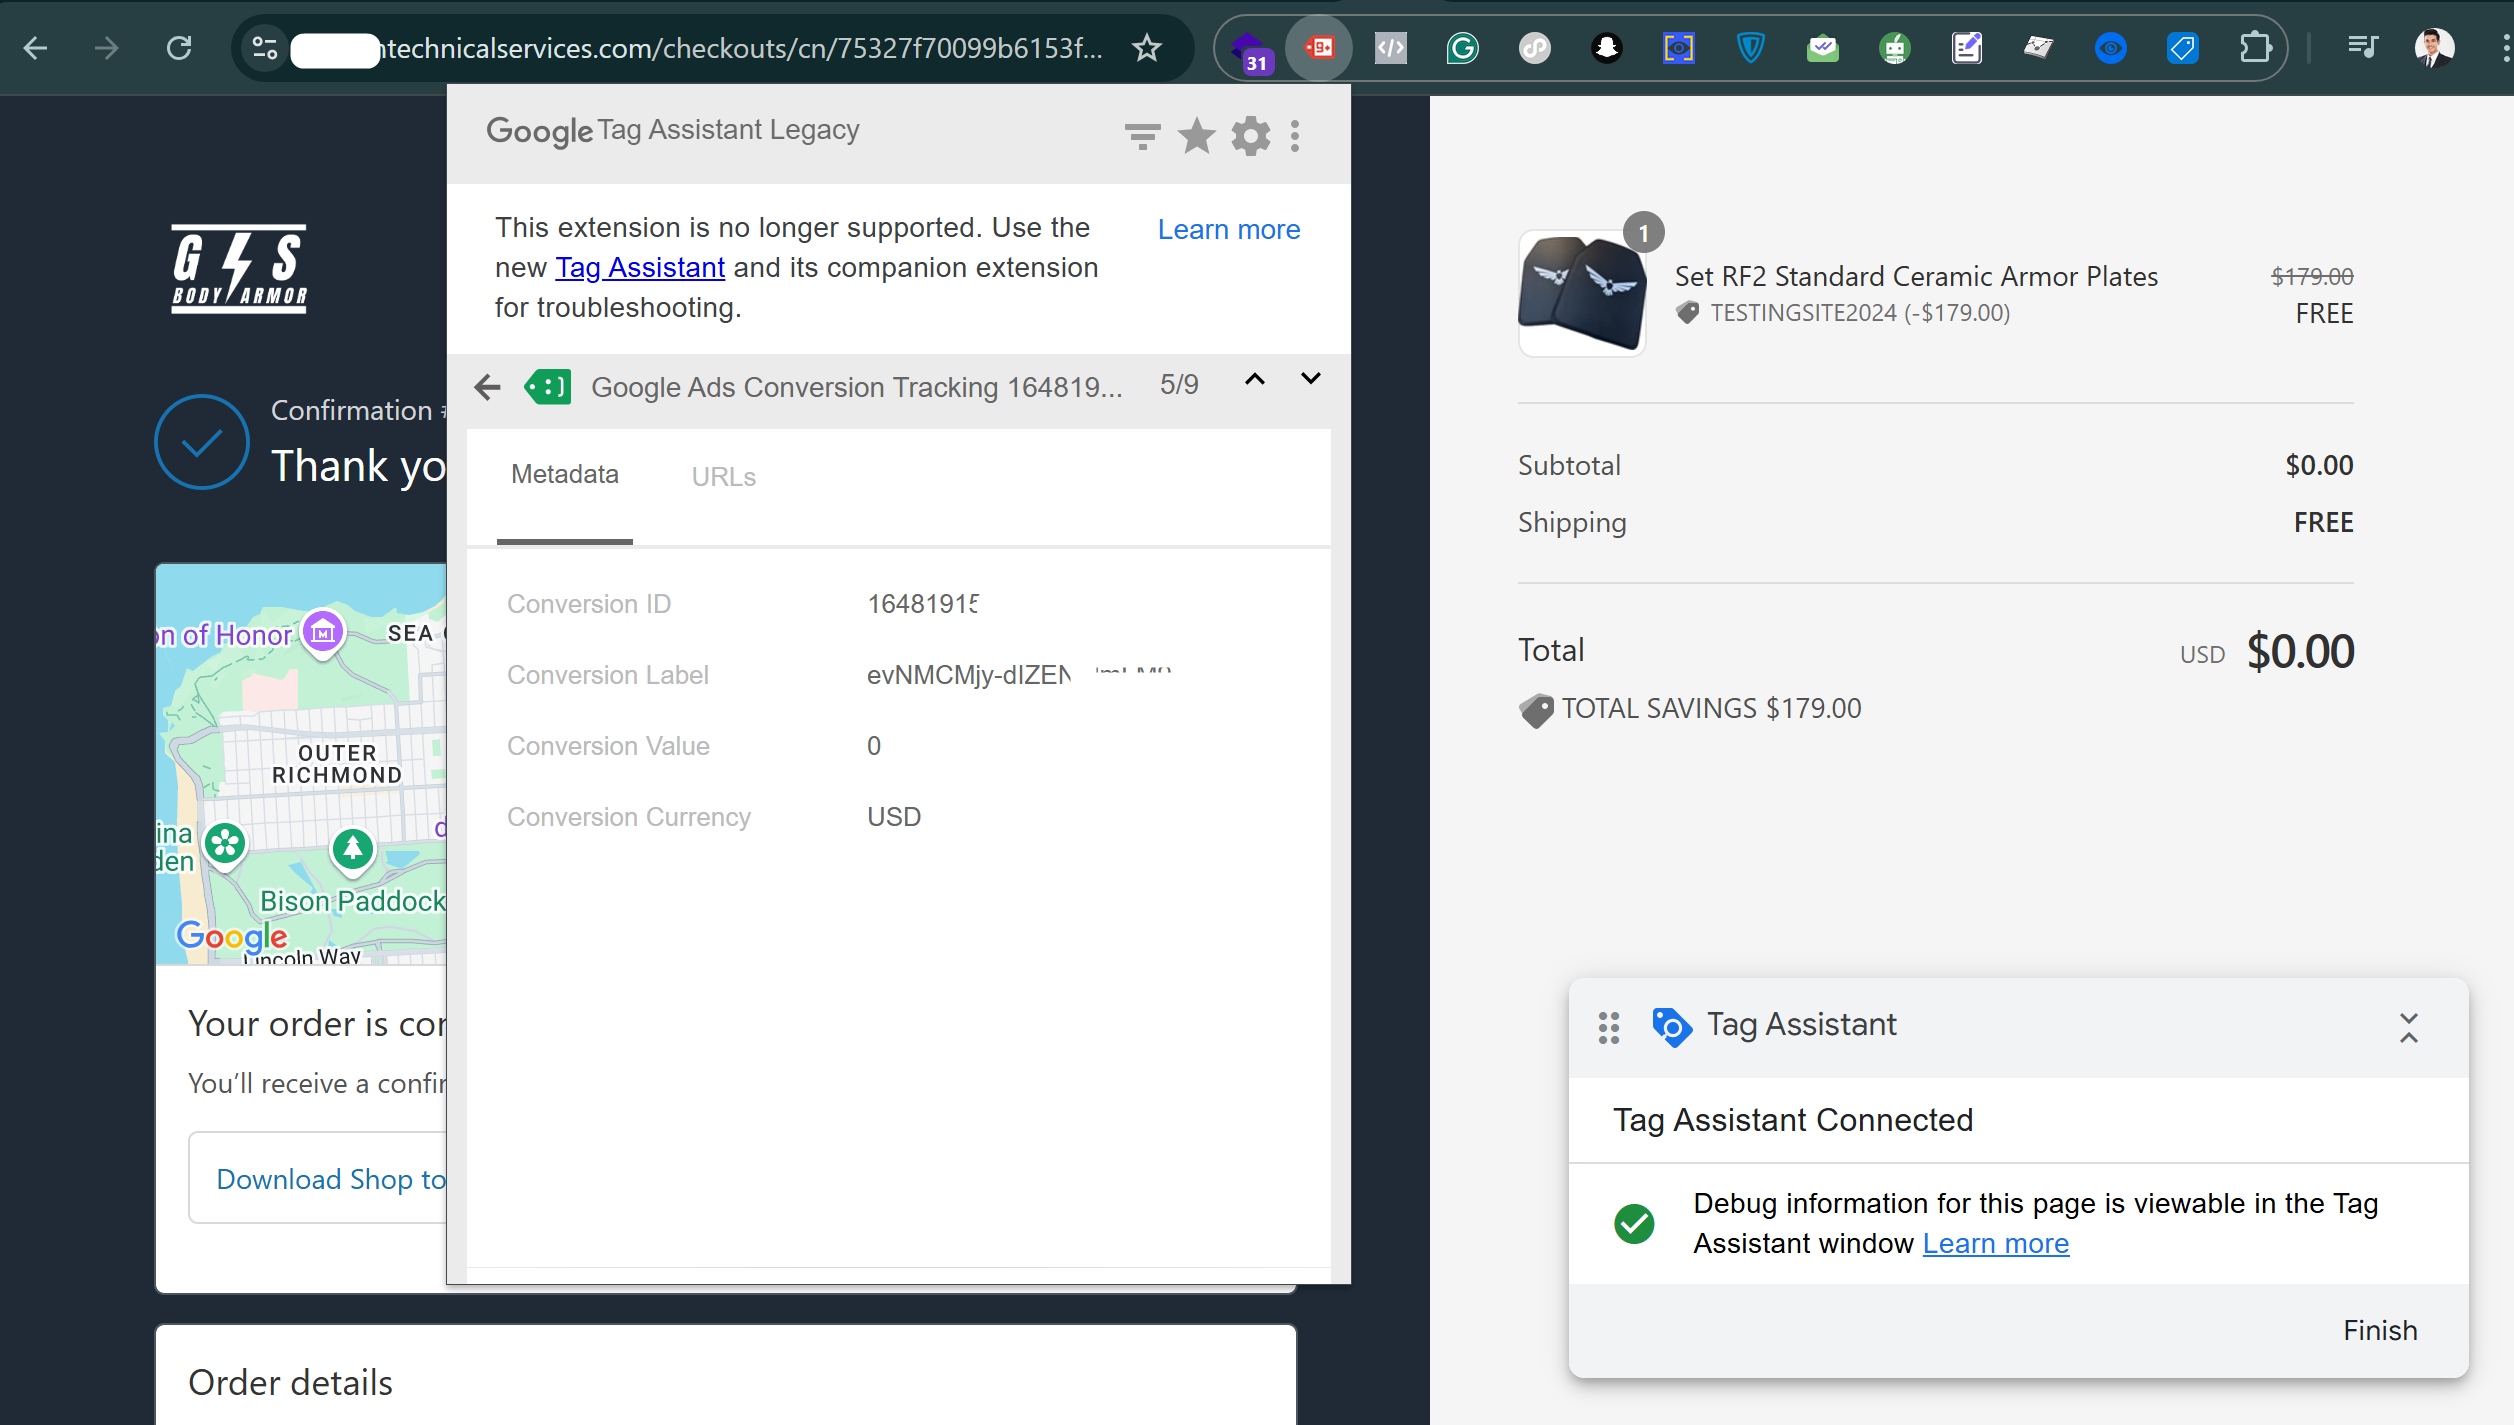
Create a trigger for the purchase event to fire on the order confirmation page
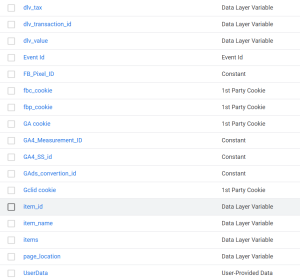
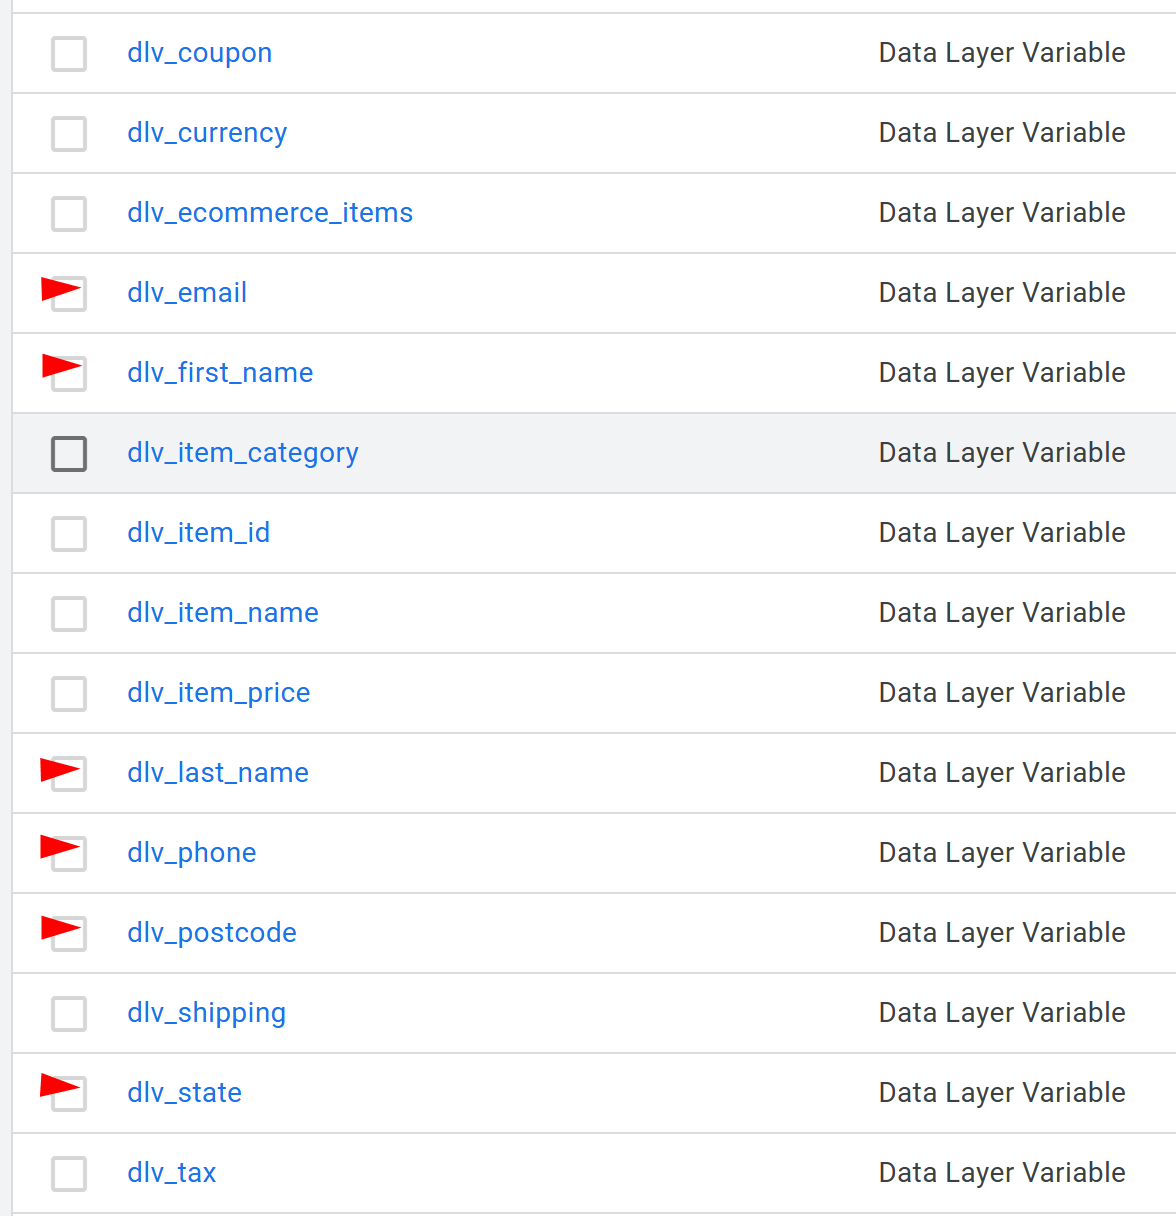
Setup Datalayer Variables:
Adding data layer variables in Google Tag Manager (GTM) allows you to capture and use specific information from your website for tracking purposes
- Create New User-Defined Variables:
- Click on New under the User-Defined Variables section.
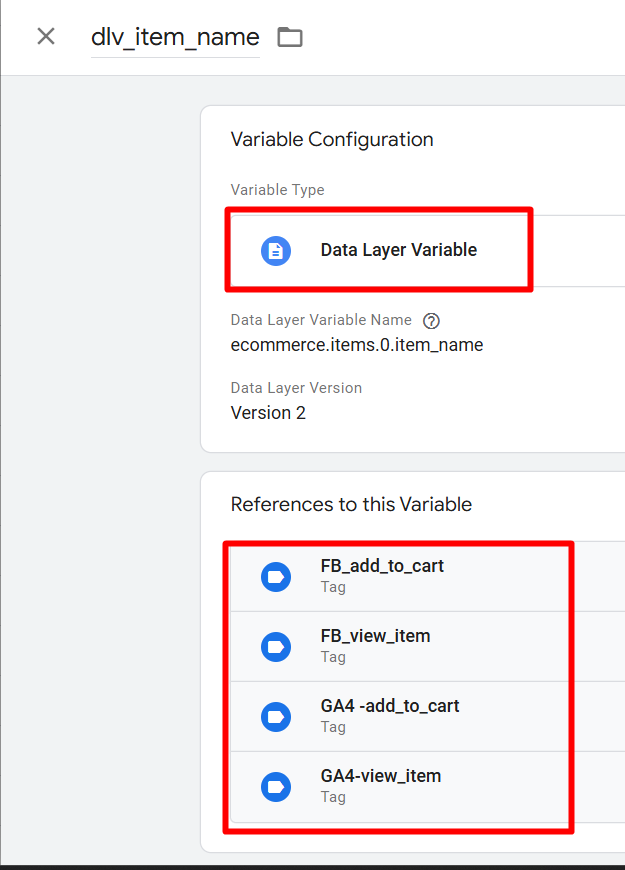
- Configure Data Layer Variables:
- Choose Variable Configuration > Data Layer Variable.
- Enter the name of the variable as defined in your website code. For example:
transaction_idvaluecurrencyitems
By following these steps, you will be able to set up purchase event tracking for your Shopify store using Meta Pixel, Google Analytics 4, and Google Ads, all through Google Tag Manager. This comprehensive tracking setup will provide valuable insights to optimize your marketing strategies and drive better business decisions.
If you have any questions or need further assistance, feel free to ask! 😊


