

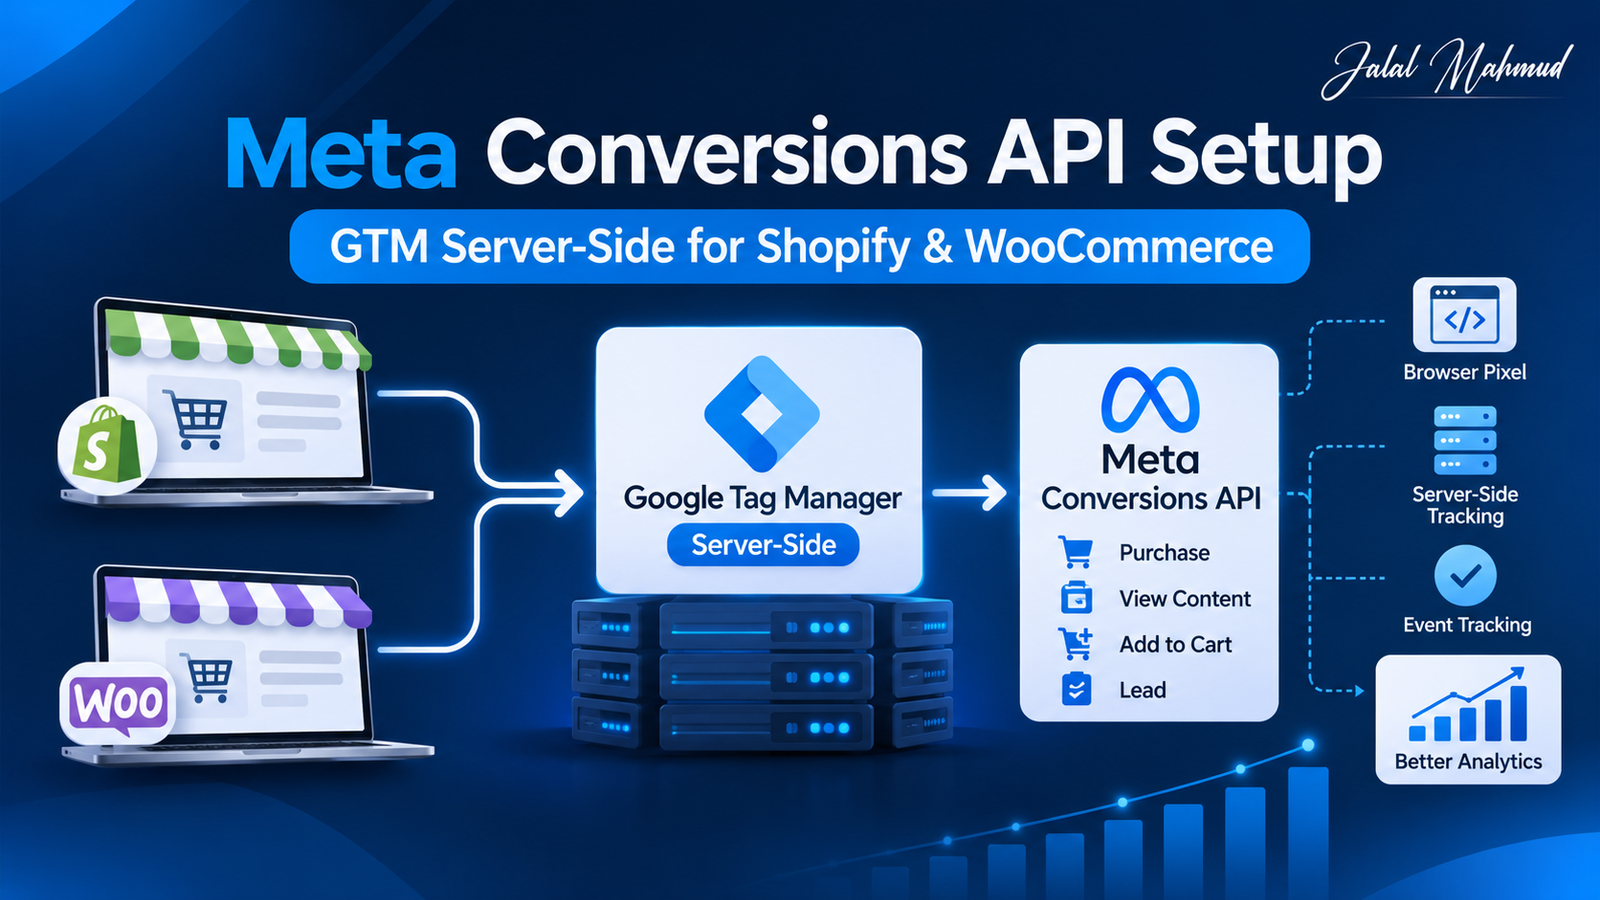
If your Facebook and Instagram ads feel like they are reporting fewer purchases than your store actually makes, you are not imagining it. Browser-only tracking loses data to ad blockers, Safari and Firefox tracking limits, and cookie restrictions. The fix most advertisers use today is the Meta Conversions API (CAPI), sent from a GTM server-side container.
In this guide, I will show you how to set up Meta Conversions API with GTM server-side tracking, step by step, for both Shopify and WooCommerce. I will also cover event deduplication, testing, and the mistakes I see most often when I audit client accounts.
What Is Meta Conversions API (CAPI)?
The Meta Conversions API lets your server send conversion events (such as Purchase, AddToCart and Lead) directly to Meta, instead of relying only on the browser-based Meta Pixel.
The browser Pixel and CAPI are meant to work together:
- Meta Pixel (browser): fires from the visitor’s browser. It is easy to set up but can be blocked.
- Conversions API (server): fires from your server. It is more reliable and lets you send richer, hashed customer data.
When both send the same event, Meta combines them into one conversion using deduplication. This is the setup Meta recommends for the most complete tracking.
Why Use GTM Server-Side for Meta CAPI?
You can send CAPI events in several ways: a platform integration, a partner plugin, or direct API code. GTM server-side is popular because:
- One tracking setup for many platforms. The same server container can feed GA4, Meta, TikTok and Google Ads.
- First-party data collection. With a custom subdomain, your tracking runs on your own domain.
- More control. You decide what data is sent, and you can filter or change events before they leave your server.
- Better data quality. You can pass hashed email, phone number, IP address and browser ID to improve Meta’s event matching.
The trade-off is that it is more technical and has a hosting cost, so it suits stores with real ad spend. If you only run small campaigns, a native platform integration may be enough (more on that below).
For professional help with Shopify tracking, WooCommerce tracking, and server-side conversion tracking, explore my Ecommerce Tracking Services to improve your website’s tracking accuracy and marketing performance.
What You Need Before You Start
Gather these first:
- A web GTM container already installed on your site.
- A server GTM container. Create one in Google Tag Manager by choosing Admin, Create Container, Server.
- A hosting setup for the server container. Options include Google Cloud (App Engine or Cloud Run) or a managed host such as Stape. The automatic provisioning option in GTM is meant for testing only, so use your own hosting for a live store.
- A custom tagging subdomain, for example metrics.yourstore.com, pointed to your server container with DNS records.
- Your Meta Pixel (Dataset) ID.
- A Conversions API access token. In Meta Events Manager, open your Pixel, go to Settings, find Conversions API, and generate an access token. Keep it private.
- GA4 ecommerce events (view_item, add_to_cart, begin_checkout, purchase) already pushed to the data layer. We use these as the source for Meta events.
Note: menu names in Meta, Shopify and GTM change from time to time, so follow the same idea if a label looks slightly different.
Step 1: Set Up Your Server Container and Custom Domain
- Provision your server container on your chosen host.
- Create a subdomain such as metrics.yourstore.com and add the DNS records your host gives you.
- In the server container settings, add the custom domain as the tagging server URL.
- Open the URL with /healthy at the end. If you see “ok,” the server is running.
Using your own subdomain helps your tracking behave as first-party, which makes the cookies and requests more durable.
Step 2: Send Events from Your Website to the Server Container
In your web container, tell your Google tag (GA4) to send data to your server instead of directly to Google:
- Open your Google tag / GA4 configuration tag.
- Add the configuration parameter server_container_url with your tagging URL, for example https://metrics.yourstore.com.
- Keep your GA4 event tags as they are. They will now send events to your server container first.
In the server container, make sure a GA4 client exists. This client receives the incoming events and turns them into data your server tags can use.
Open Preview in the server container and browse your site. You should see GA4 events (page_view, view_item, and so on) arriving.
Step 3: Create an Event ID for Deduplication
This step is the one most people skip, and it causes double-counted conversions.
For each event, Meta needs the same event name and the same event ID from both the browser Pixel and the server. Meta then keeps one and discards the duplicate.
The simplest approach is to create a unique ID when the event happens and include it in your data layer push:
dataLayer.push({
event: ‘purchase’,
event_id: ‘order_’ + Date.now() + ‘_’ + Math.random().toString(36).slice(2, 8),
ecommerce: {
transaction_id: ‘T-10045’,
value: 129.99,
currency: ‘USD’,
items: [ /* your items */ ]
}
});
Then:
- Add event_id as an event parameter on your GA4 event tags, so it reaches the server.
- Use the same value as the Event ID in your browser Meta Pixel tag.
For purchases, many people use the order ID as the event ID, since it is unique and consistent. Whatever you choose, the browser and the server must match exactly.
Step 4: Add the Meta Conversions API Tag in the Server Container
- In the server container, open Templates and add the Facebook Conversion API tag from the Community Template Gallery (Meta’s official template).
- Create a new tag using this template.
- Enter your Pixel ID and your API access token. Store the token in a variable so it is easy to update.
- Set the event name to Inherit from client. This automatically maps common GA4 events to Meta standard events:
GA4 event | Meta event |
page_view | PageView |
view_item | ViewContent |
add_to_cart | AddToCart |
begin_checkout | InitiateCheckout |
purchase | Purchase |
generate_lead | Lead |
- Add a trigger that fires the tag on these GA4 events.
- Confirm the tag passes the event ID, the event source URL, and customer data when available.
Improve Event Match Quality
Meta scores how well your events match real people. To improve it, send as many of these as you legitimately have:
- Email and phone number (Meta requires these to be hashed with SHA-256; check in Test Events that your values arrive hashed or are hashed by the tag)
- First name, last name, city, state, zip and country
- The _fbp and _fbc browser cookies
- Client IP address and user agent
A higher match quality usually means better attribution and better ad optimization.
Step 5: Keep the Browser Pixel Running
Do not remove the browser Pixel when you add CAPI. Keep your Meta Pixel tag in the web container, and make sure it uses the same event names and event IDs as the server events. This redundant setup is what gives the best coverage. If you need a refresher, see my guide on setting up the Meta Pixel with Google Tag Manager.

Shopify Setup
Shopify has two realistic paths. Pick one main path so you do not double-send events.
Option A: Shopify’s built-in Meta integration (simplest)
The Facebook and Instagram sales channel can send server events with Meta’s Conversions API, with no GTM server container needed. If your needs are basic, this may be enough.
Option B: GTM server-side with a Custom Pixel (more control)
Shopify’s checkout no longer allows custom scripts in the old way, so the modern approach is to use Customer Events, Custom Pixel:
- In Shopify Admin, open Settings, Customer events, and add a Custom pixel.
- In the pixel code, load your GTM container and subscribe to Shopify events such as product_viewed, product_added_to_cart, checkout_started and checkout_completed.
- Push each event into the data layer in GA4 ecommerce format, including your event_id. For purchases, use the order ID.
- Let your web container forward these events to your server container, as in Steps 2 to 4.
Important: if you use Option B, turn off server-side data sharing in Shopify’s Facebook and Instagram channel (or keep it browser-only). Running both without deduplication will inflate your purchase numbers.
WooCommerce Setup
WooCommerce does not create a GA4 ecommerce data layer by itself, so you need a plugin or custom code.
- Install GTM4WP (Google Tag Manager for WordPress) and add your GTM container ID.
- Under the plugin’s Integration settings, enable WooCommerce and turn on the ecommerce data layer (GA4 format).
- Open your site and check the data layer for view_item, add_to_cart, begin_checkout and purchase, with product items and values.
- Add your event_id to these events (a small custom snippet or a GTM variable can do this).
- Continue with Steps 2 to 4 above.
Just like with Shopify, if you also use the official Facebook for WooCommerce plugin with its server-side events turned on, disable one of the two, or make sure both use the same event IDs.
Step 6: Test Everything Before Going Live
Test in this order:
- GTM web Preview. Check that events fire and carry the right parameters, including event_id.
- GTM server Preview. Confirm the GA4 client receives the event and the Meta CAPI tag fires with status 200 (success).
- Meta Events Manager, Test Events. Copy your test event code into the CAPI tag, then browse your site. You should see both Browser and Server events.
- Check deduplication. Matching browser and server events should show as deduplicated, not counted twice.
- Place a test order and confirm one Purchase with the right value and currency.
- Remove the test event code before you publish, or live events will keep going to the test tab only.
After launch, check the Event Match Quality score and the Diagnostics tab in Events Manager over the next few days.
Common Mistakes to Avoid
- Missing or mismatched event IDs. This is the number one cause of duplicate purchases.
- Sending events from two systems. For example, a Meta plugin and GTM both sending Purchase.
- Wrong event names. Meta treats purchase and Purchase differently. Use standard event names.
- No value or currency on Purchase. Meta cannot optimize for revenue without them.
- Forgetting consent. If your visitors are covered by privacy laws (such as GDPR or US state laws like CCPA), make sure your tags respect consent choices. I cover this in my Consent Mode v2 guide.
- Leaving the test event code in place after testing.
- Exposing the access token in public code. Keep it in the server container only.
Frequently Asked Questions
Do I still need the Meta Pixel if I use the Conversions API?
Yes, in most cases. Meta recommends using both together, with deduplication, for the most complete data.
Is the Conversions API free?
The API itself is free. You pay for server hosting (Google Cloud or a managed host), and the cost depends on your traffic. Check current hosting prices before you choose.
Will Conversions API fix all my tracking problems?
It will recover a lot of lost data, but no setup is perfect. Reports can still differ between Meta, GA4 and your store because each tool counts conversions differently.
How long before I see results in Ads Manager?
Events show up in Events Manager within minutes. Improvements in attribution and optimization usually take a few days to a couple of weeks as Meta collects cleaner data.
Can I use CAPI without GTM server-side?
Yes. Shopify and WooCommerce both have built-in or plugin options, and you can also send events with custom code. GTM server-side is best when you want one flexible setup for several ad platforms.
What is a good Event Match Quality score?
Higher is better. Aim for a “Good” rating or above on your key events, especially Purchase, by sending hashed email, phone, and browser identifiers.
Final Thoughts
Setting up Meta Conversions API with GTM server-side takes some work, but it gives you more complete conversion data, better ad optimization, and tracking that is less dependent on the browser. The key points to remember: use a custom domain, send matching event IDs from the browser and server, avoid double-sending from plugins, and test before you go live.
